
Building 3D Printer Enclosure
For the sake of my well-being, I decided to create an enclosure for my Prusa Mini+. I couldn't stand the smell of melting filament or the incessant hum of the fan and stepper motors.

Initially, I assumed there'd be plenty of guides and materials available. Surprisingly, there weren't many, and the ones I found recommended parts not easily sourced locally. Plus, I'm impatient bastard. I did consider purchasing a pre-made enclosure, but the $350 asking price for the original Prusa Enclosure seemed a bit much, especially since it didn't come with lighting. Besides, with work being so demanding, a DIY project seemed like a welcome distraction.
+ Advantages:
An enclosure will help maintain the dryness of your filament through the passive heat generated by the printer.
The noise level will decrease, especially in the upper frequency range, although some movements may produce resonant frequencies within the enclosure.
Lower fumes are generated in the surrounding area, but exercise caution when opening it and inhaling directly into your lungs.
Prints will not curl or detach from the bed, as a consistent temperature is maintained, preventing drafts and sudden fluctuations.
You can experiment with a wider range of materials, including those that require higher print bed temperatures or more controlled conditions.
- Disadvantages:
The enclosure will retain all the heat, causing stepper motors to run at higher temperatures. However, most manufacturers state that operating them at 80 degrees Celsius is within acceptable limits.
Initial Design
I decided against creating a fireproof enclosure since it would be pricier, and honestly, I don't feel I need it. I have confidence in Prusa printers; they're made with top-notch components and have software oversight. I never leave the printer on overnight, and besides, I've got an Obico with a camera for monitoring.
I went ahead and bought six 50x50cm, 4mm thick plexiglass sheets, each was about $10. I tried to design everything so it could be printed, beginning with triangular corner brackets.
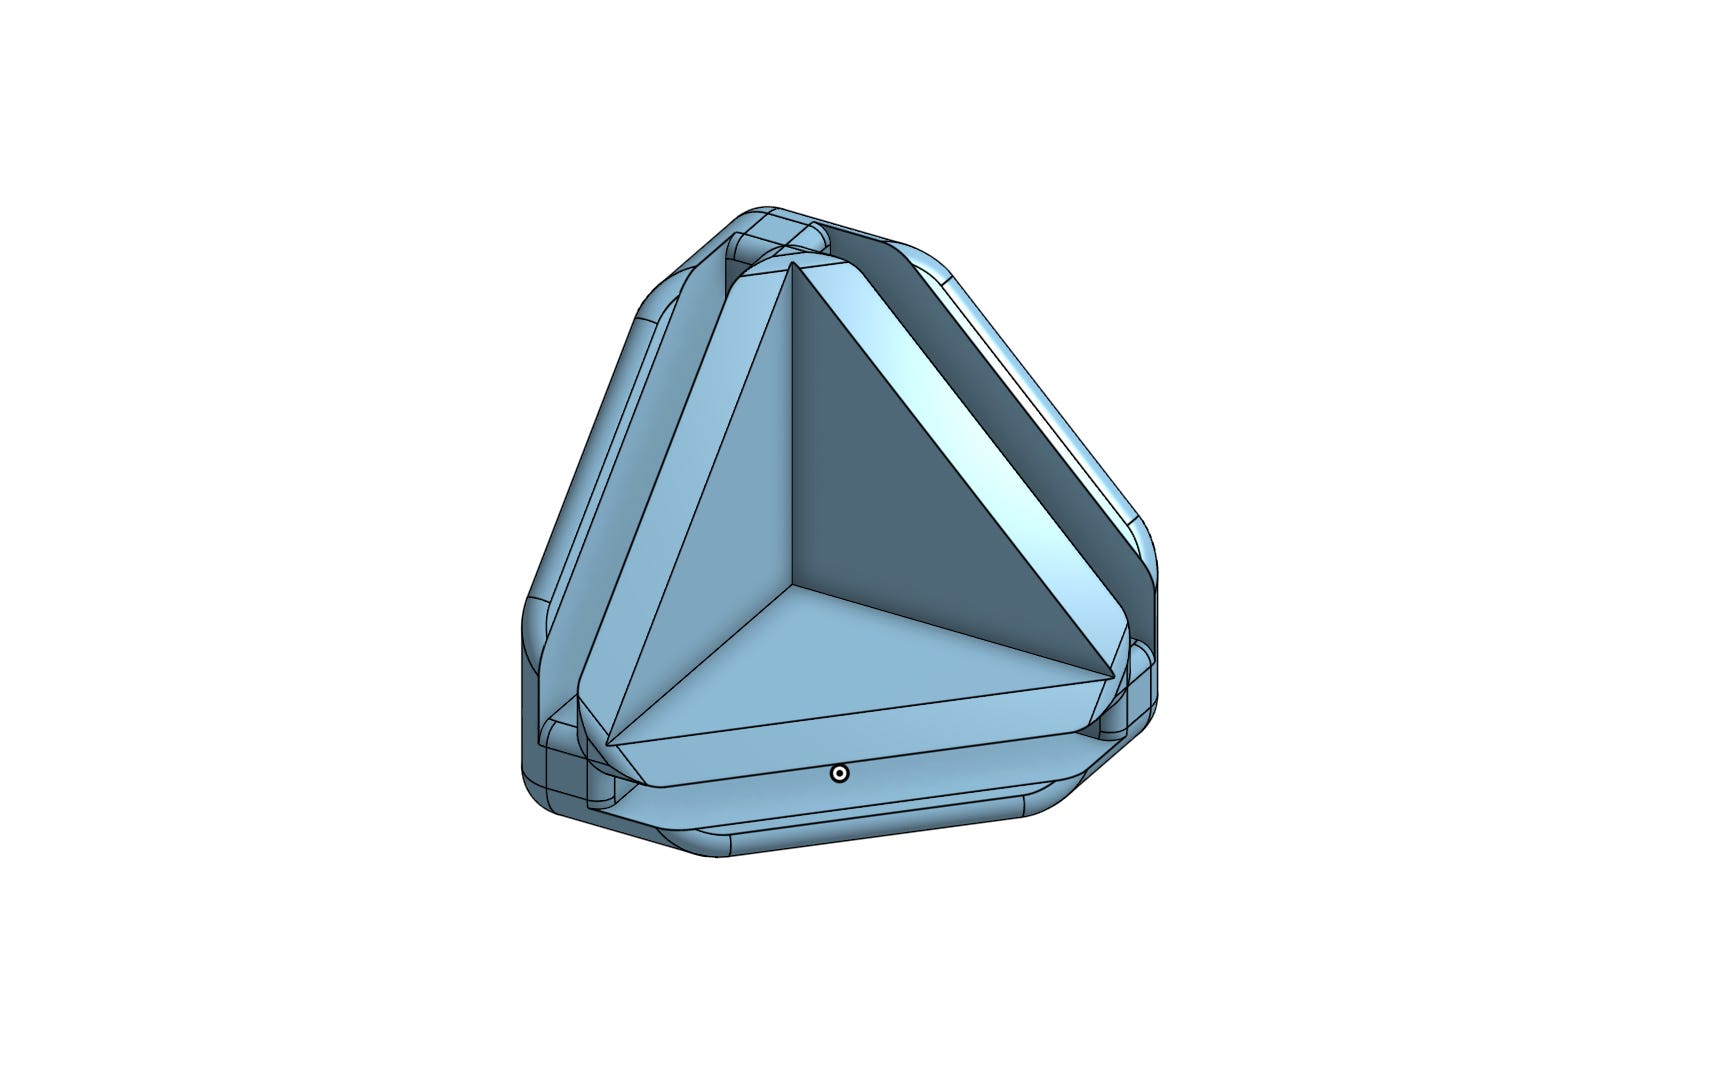
However, this left some gaps along the edges of the plexiglass. I considered redesigning the brackets to have the plexiglass overlap, but resizing and cutting the material is something I really dislike.
I also considered making additional parts to bridge those gaps. I eventually settled on a snap-in design since I am limited in dimensions (Prusa Mini has 180mm x 180mm printing dimensions).
Yet, the prospect of printing so many components felt daunting, so I opted out.
Back to the Drawing Board
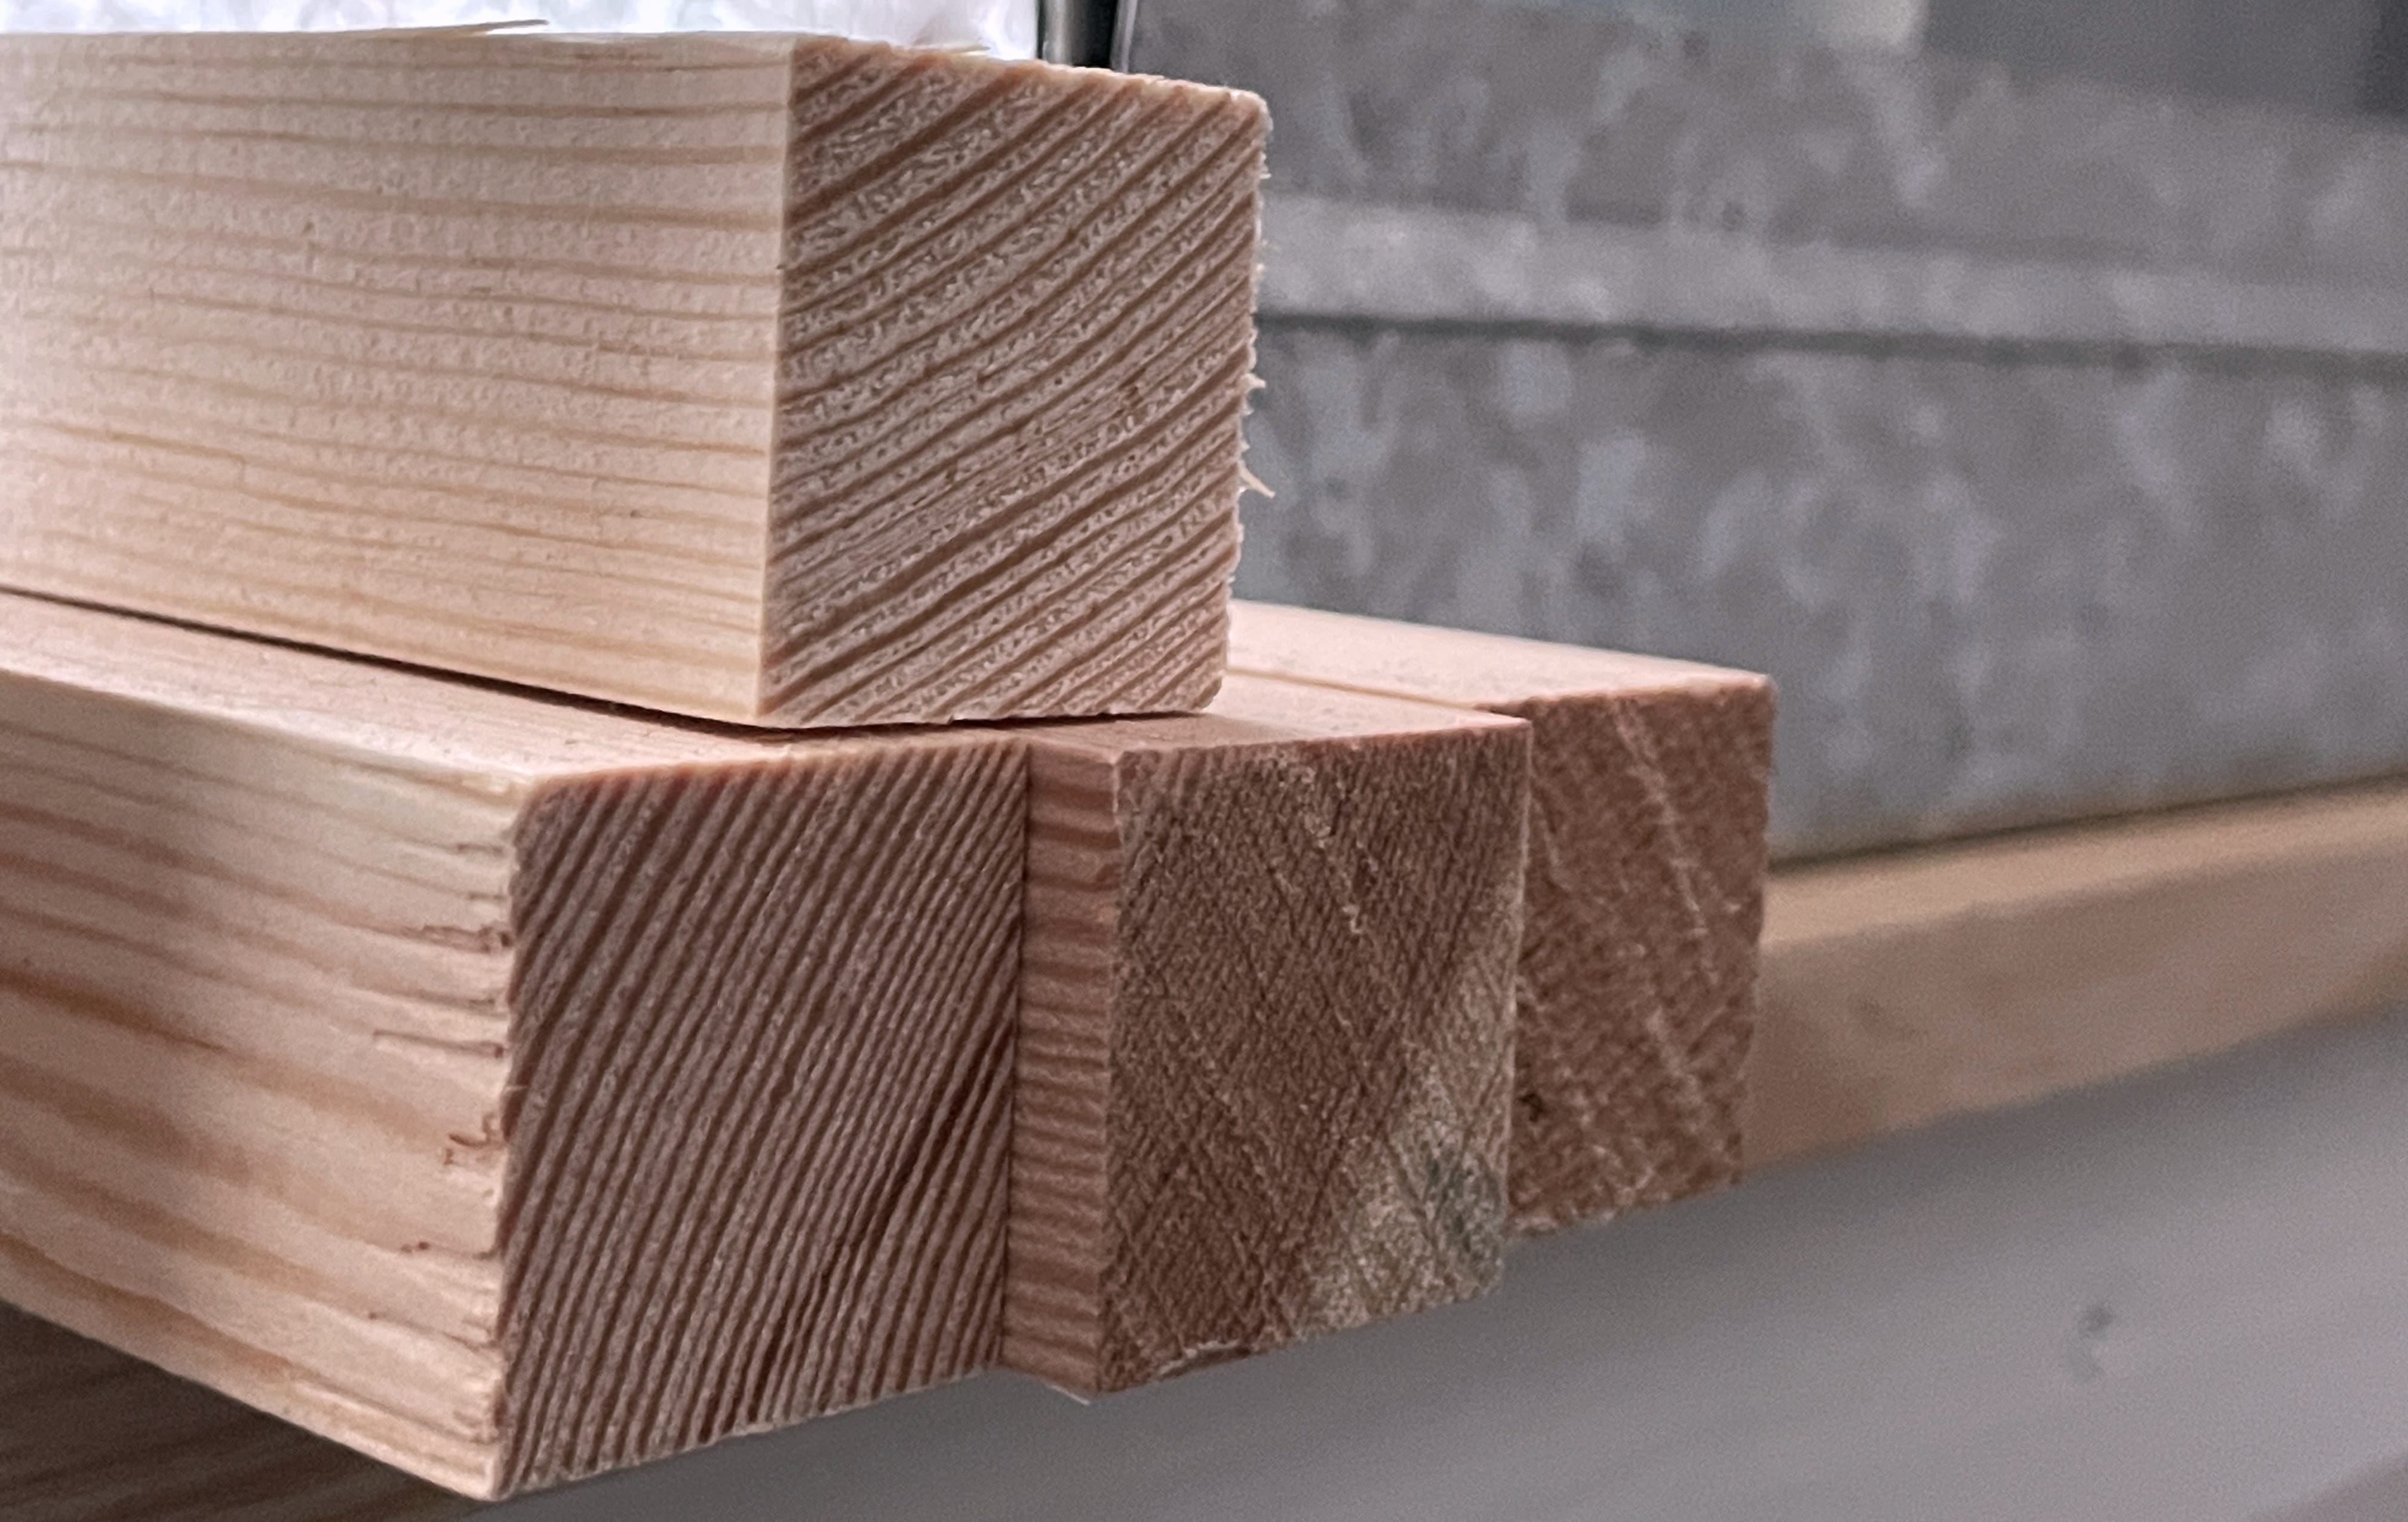
Ok, what now? I definitely needed to add some structural components. I've decided on wooden beams since they're both affordable and easy to find. I spent around half an hour arranging the beams on the store floor to check their straightness. The wood often isn't dried well and can be warped. This was also the case.
As cube has 12 edges, I needed 8 shorter beams of length:
I ended up with eight beams, each measuring 44.4cm, considering they were each 2.8cm by 2.8cm. The staff gave me odd looks when I requested the 44.4cm cuts :). On top of that, I got four beams that were 50cm long.
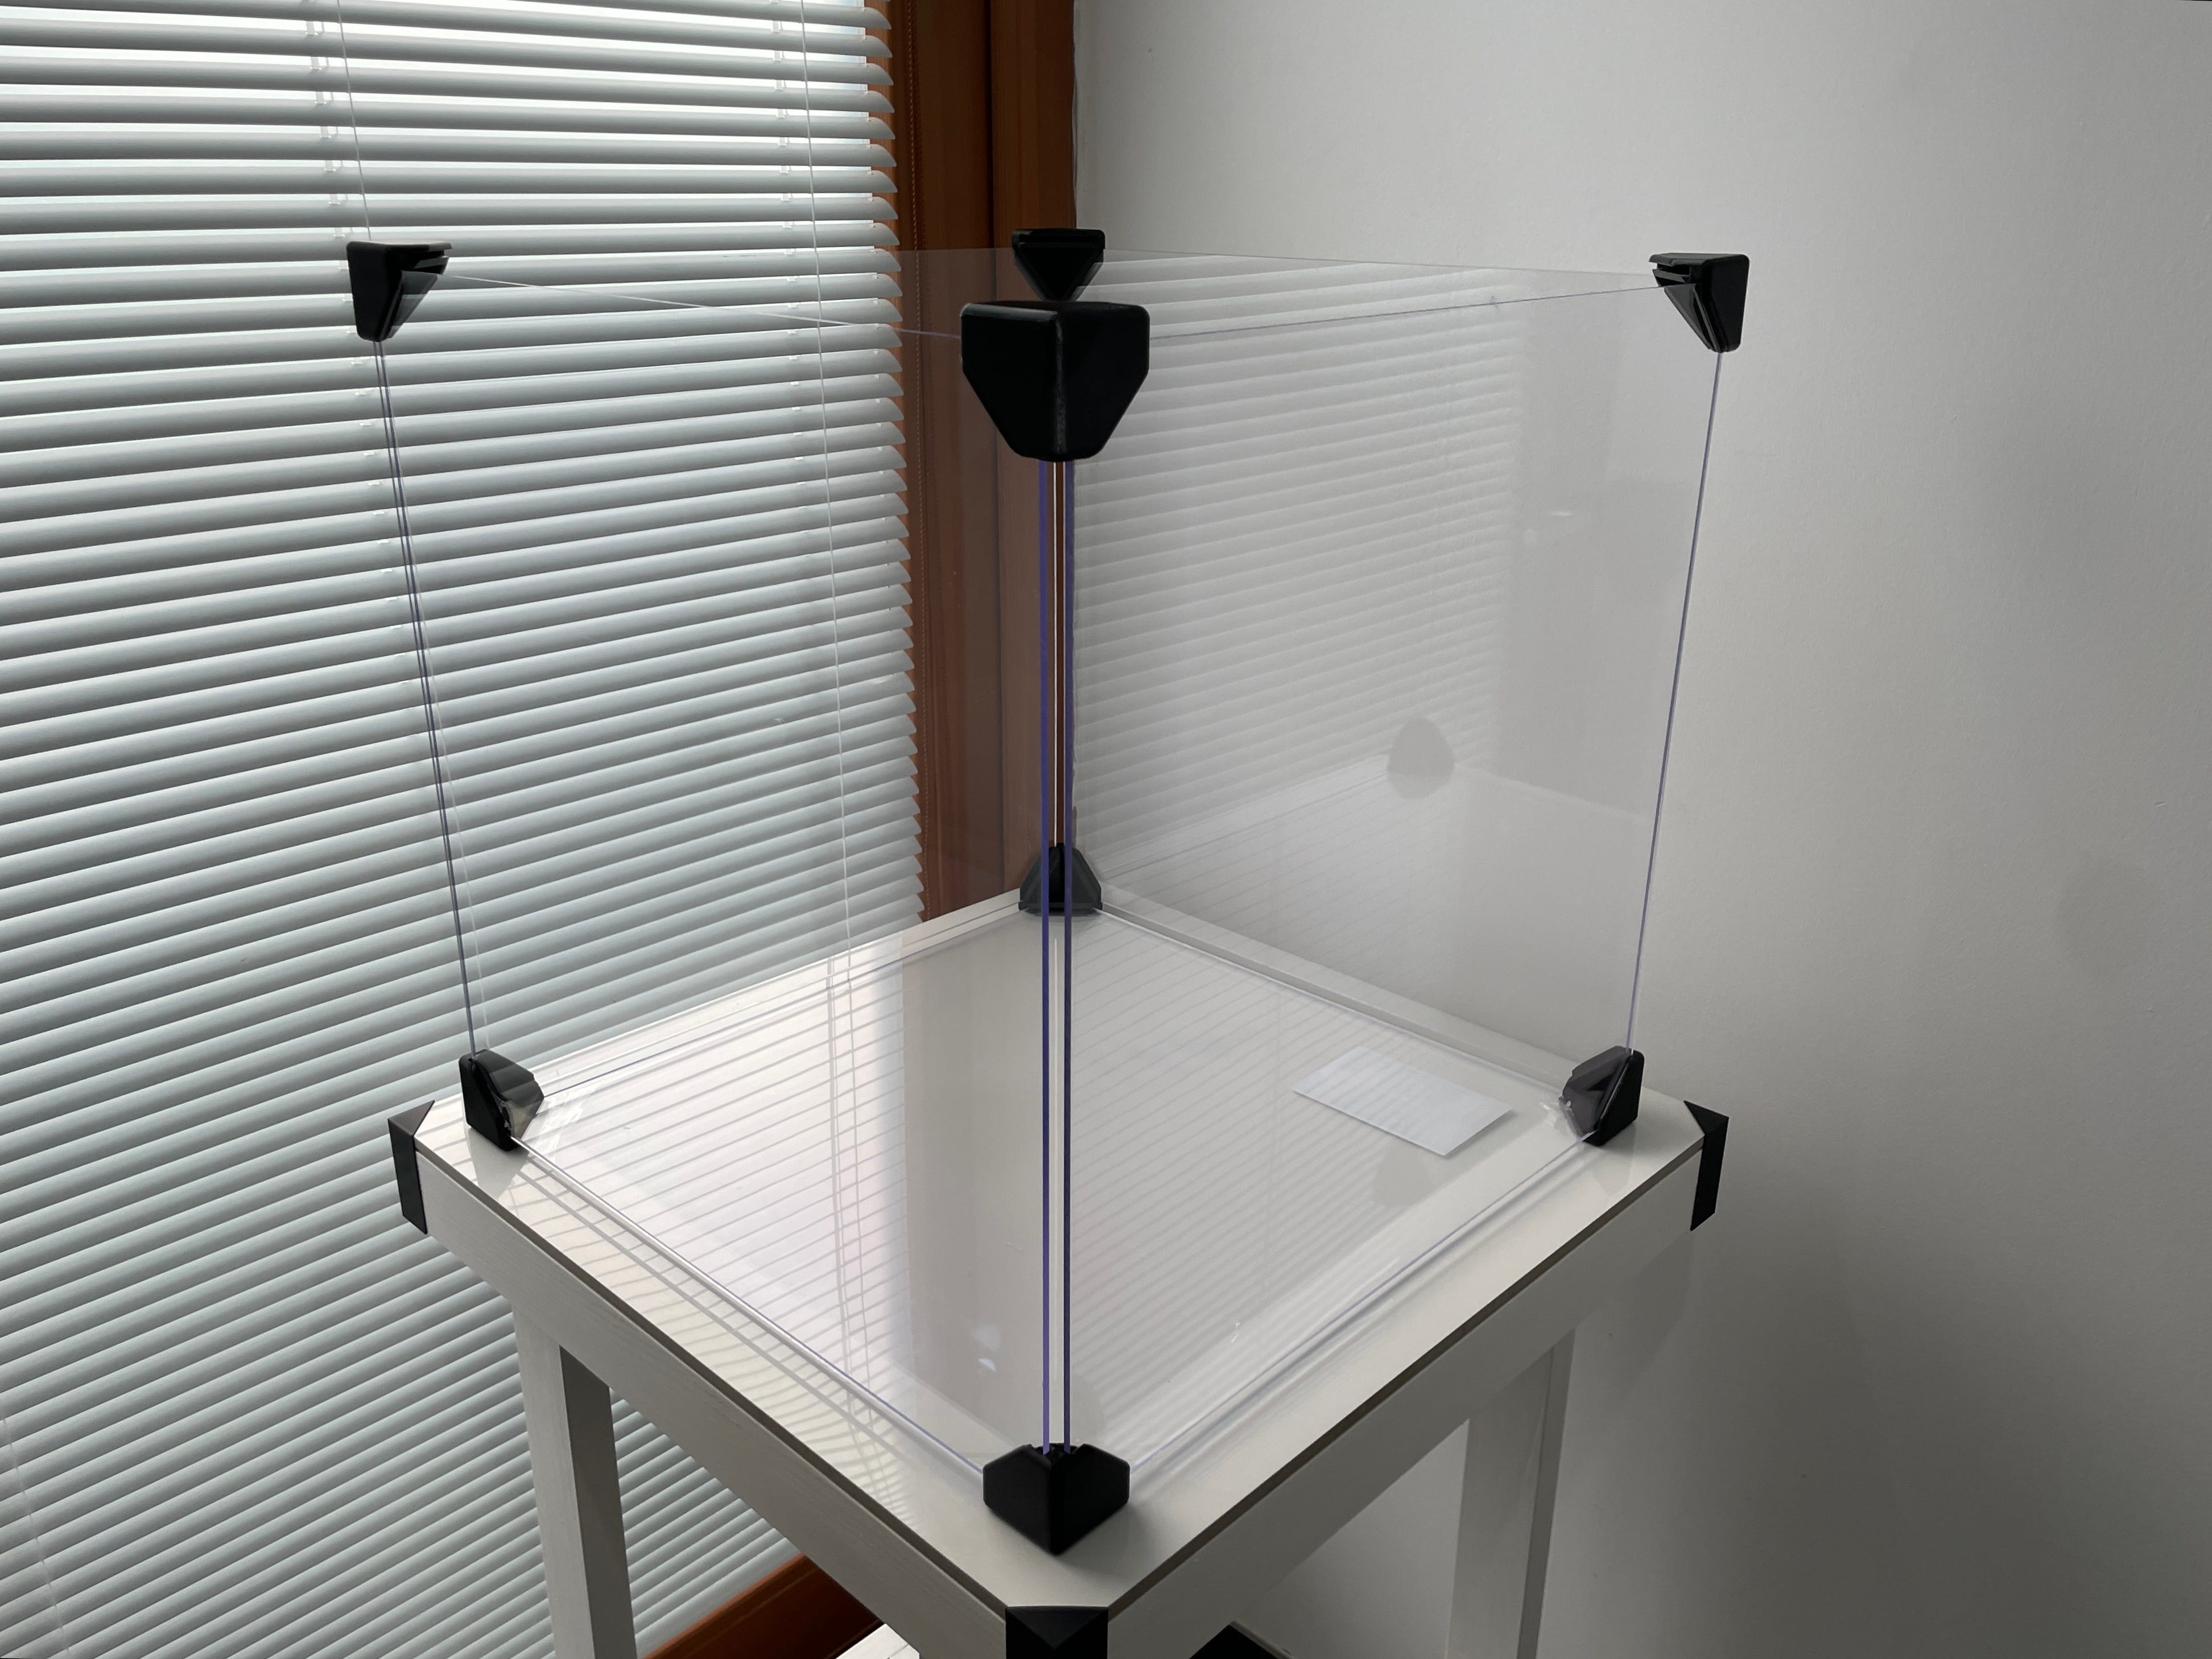
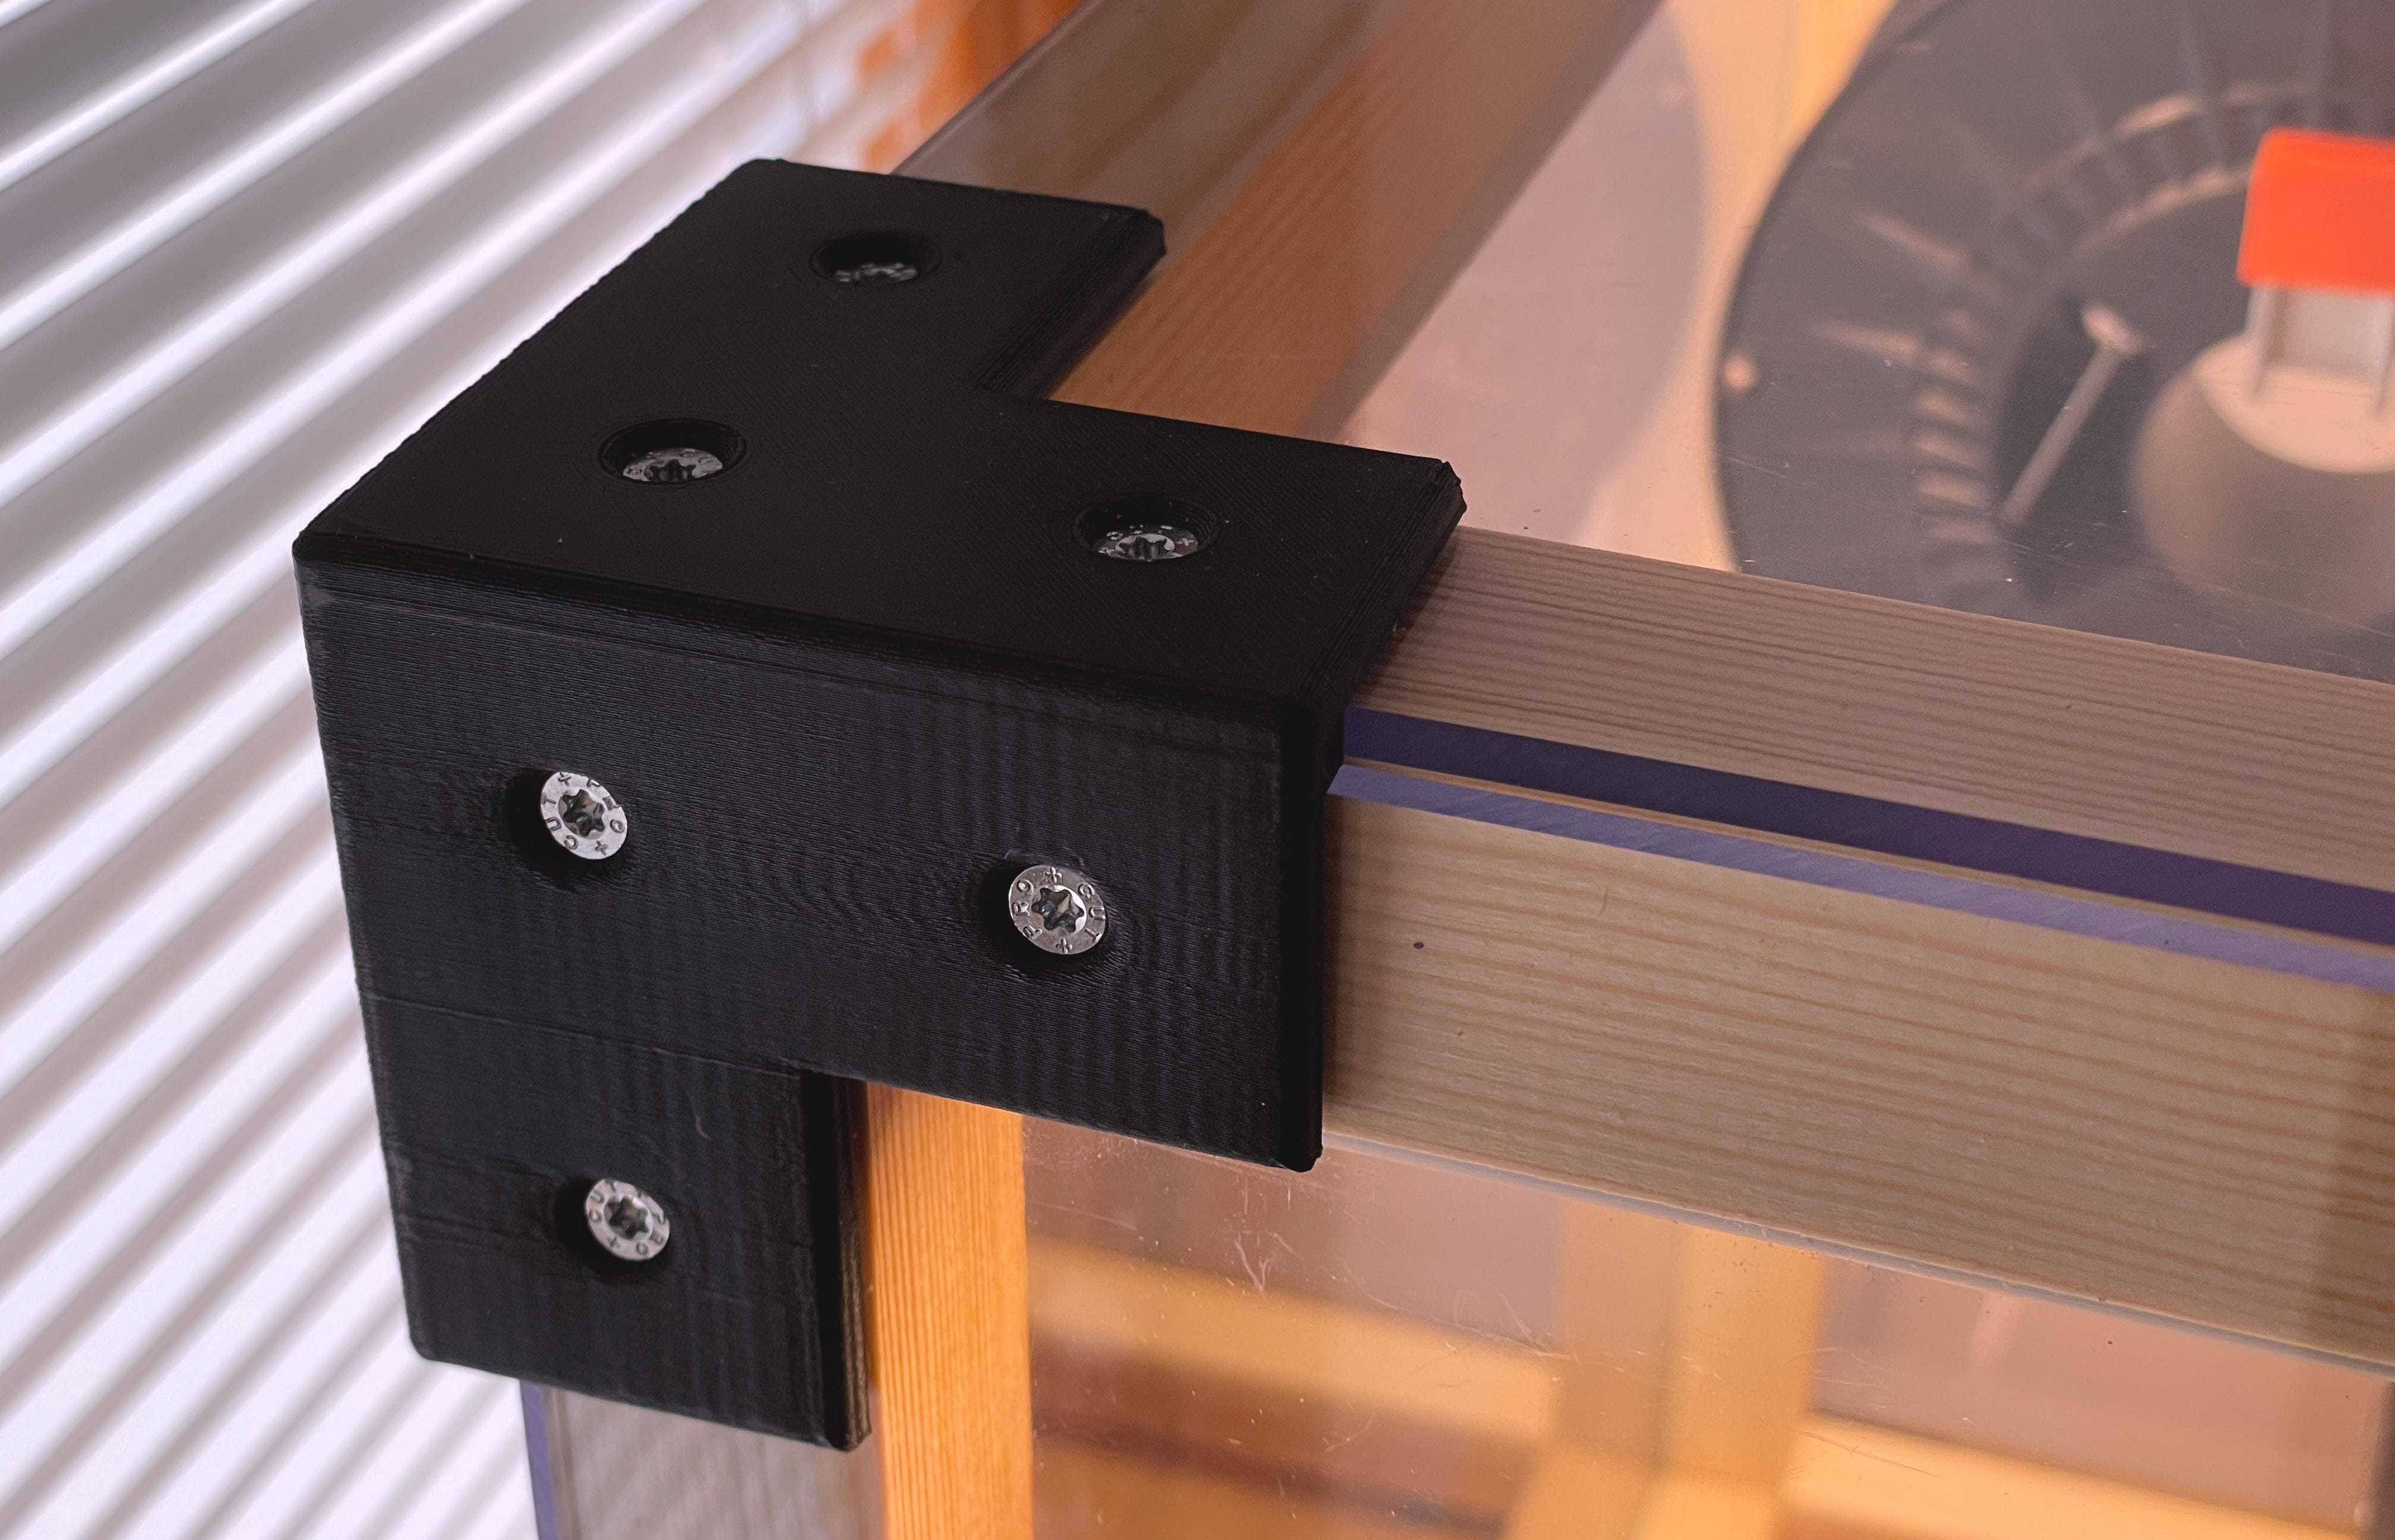
Great. We've got the wood cut to the right length. Next, I needed to create the corner joints. Plus, we have to figure out how to secure the plexiglass to the beams. Maybe we can handle both tasks in one go?
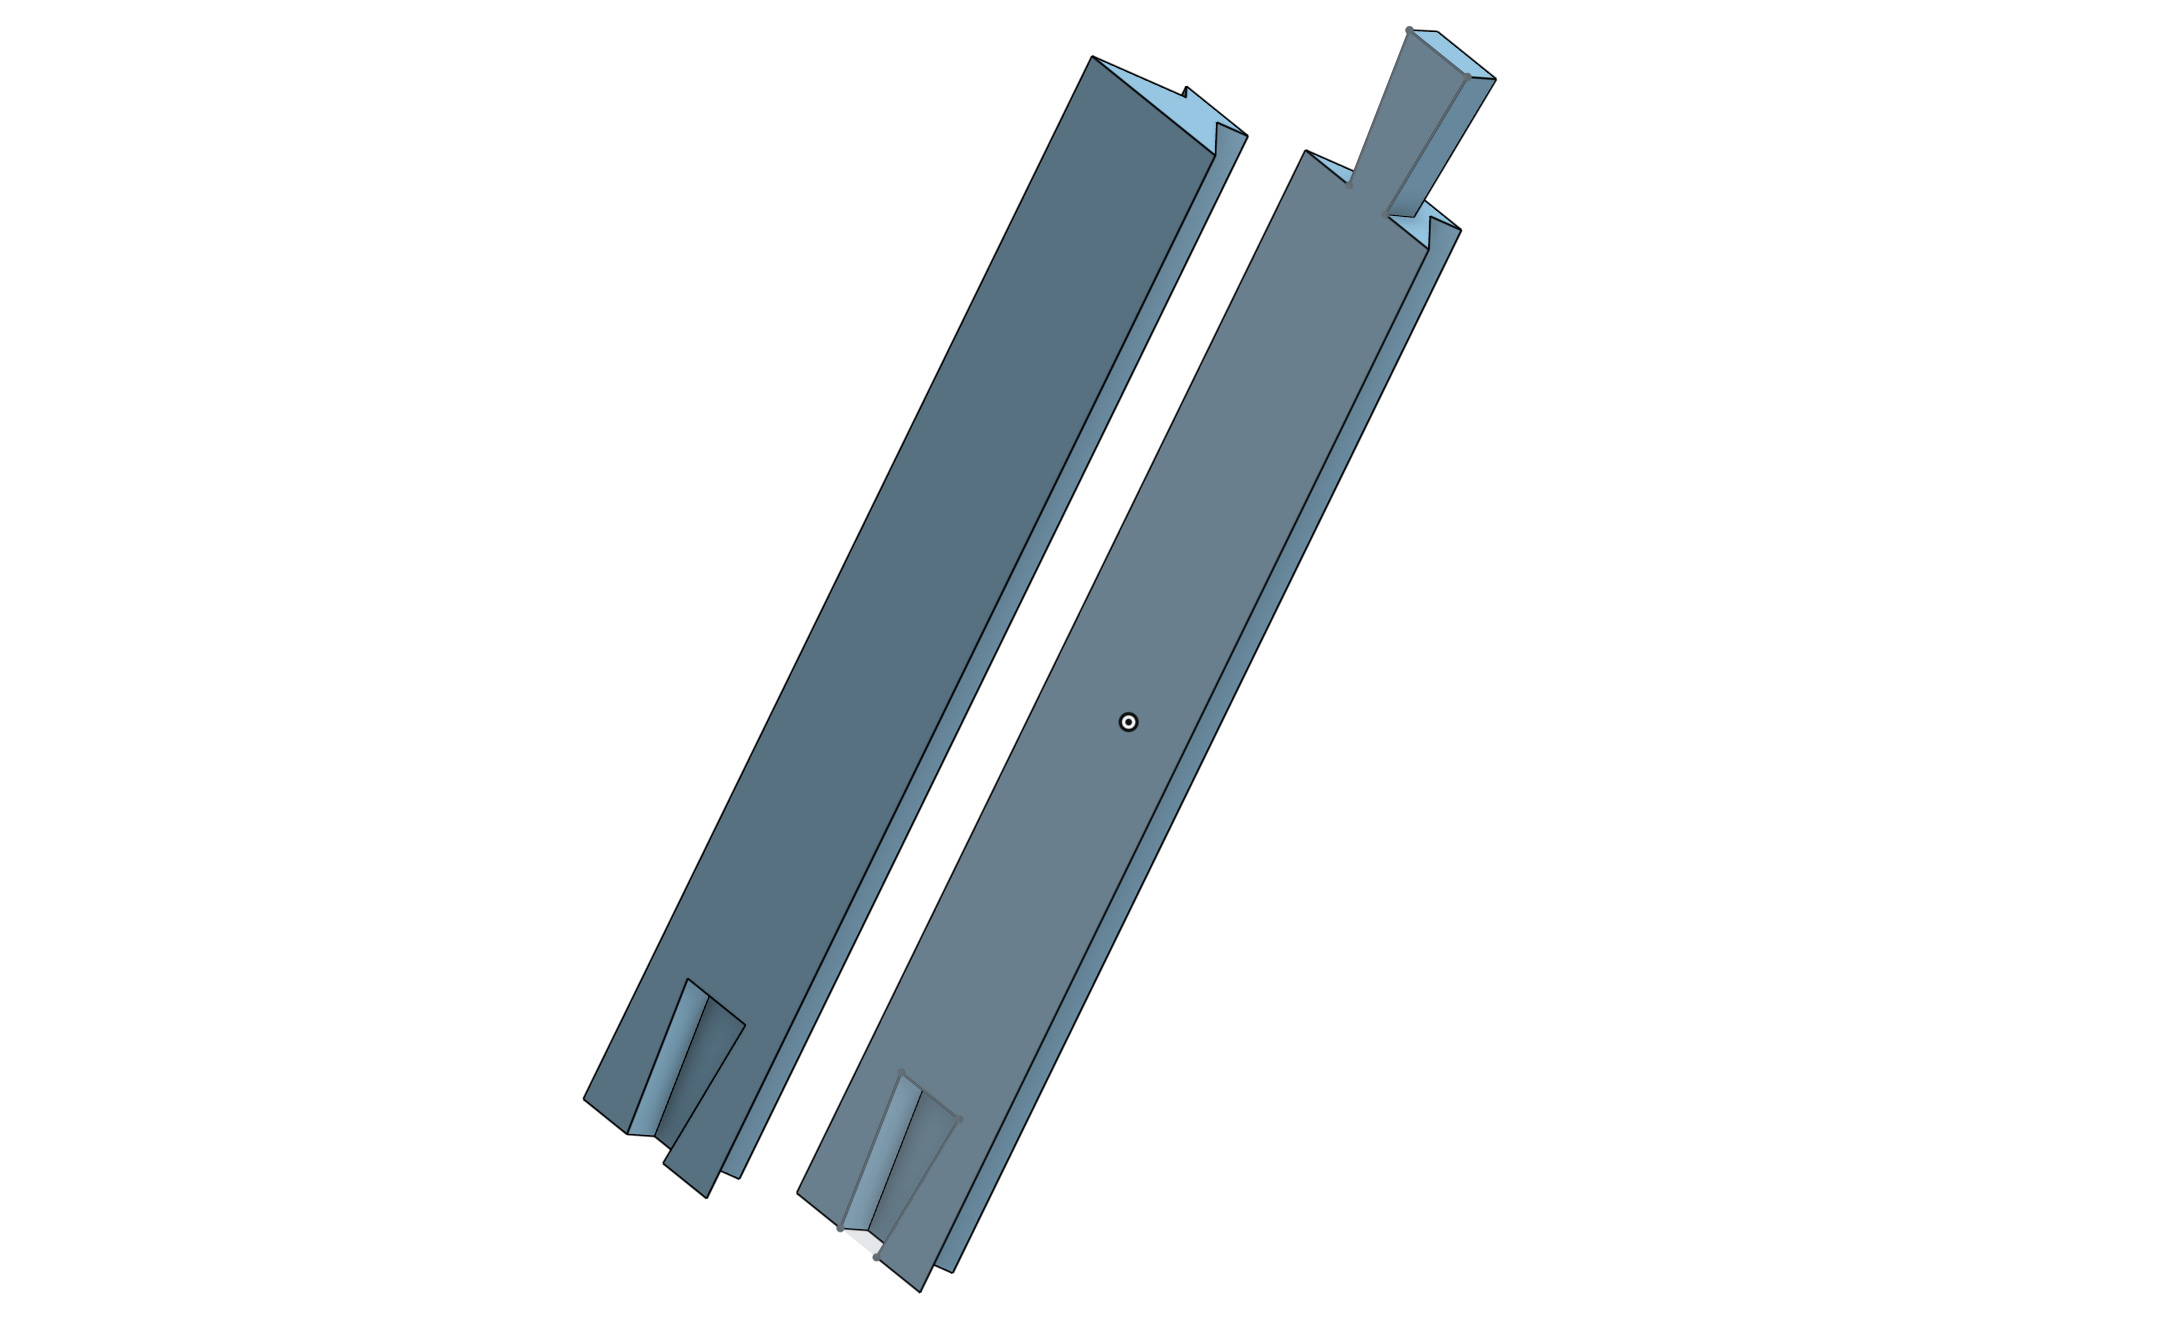
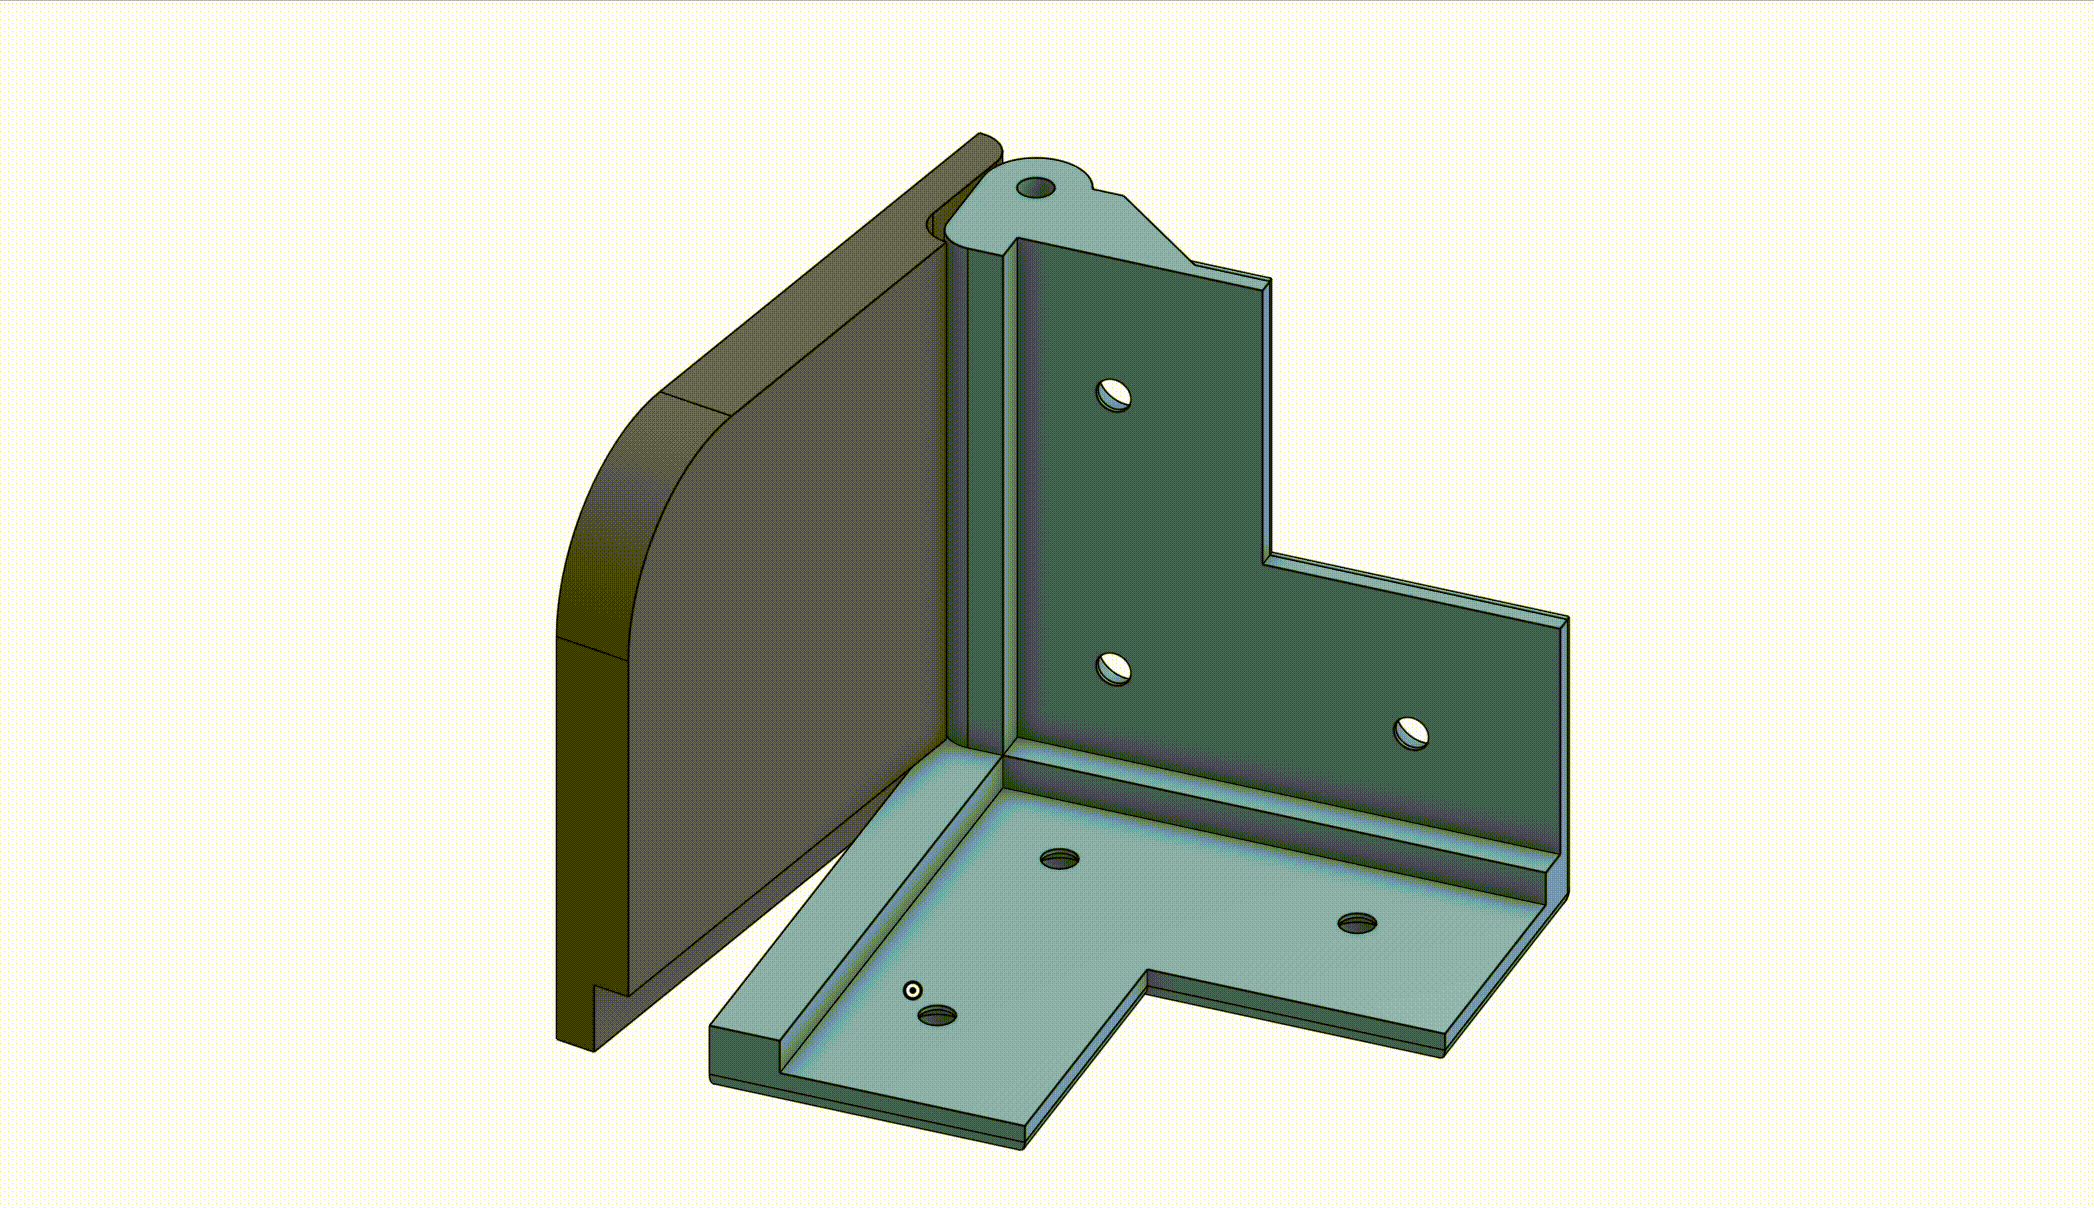
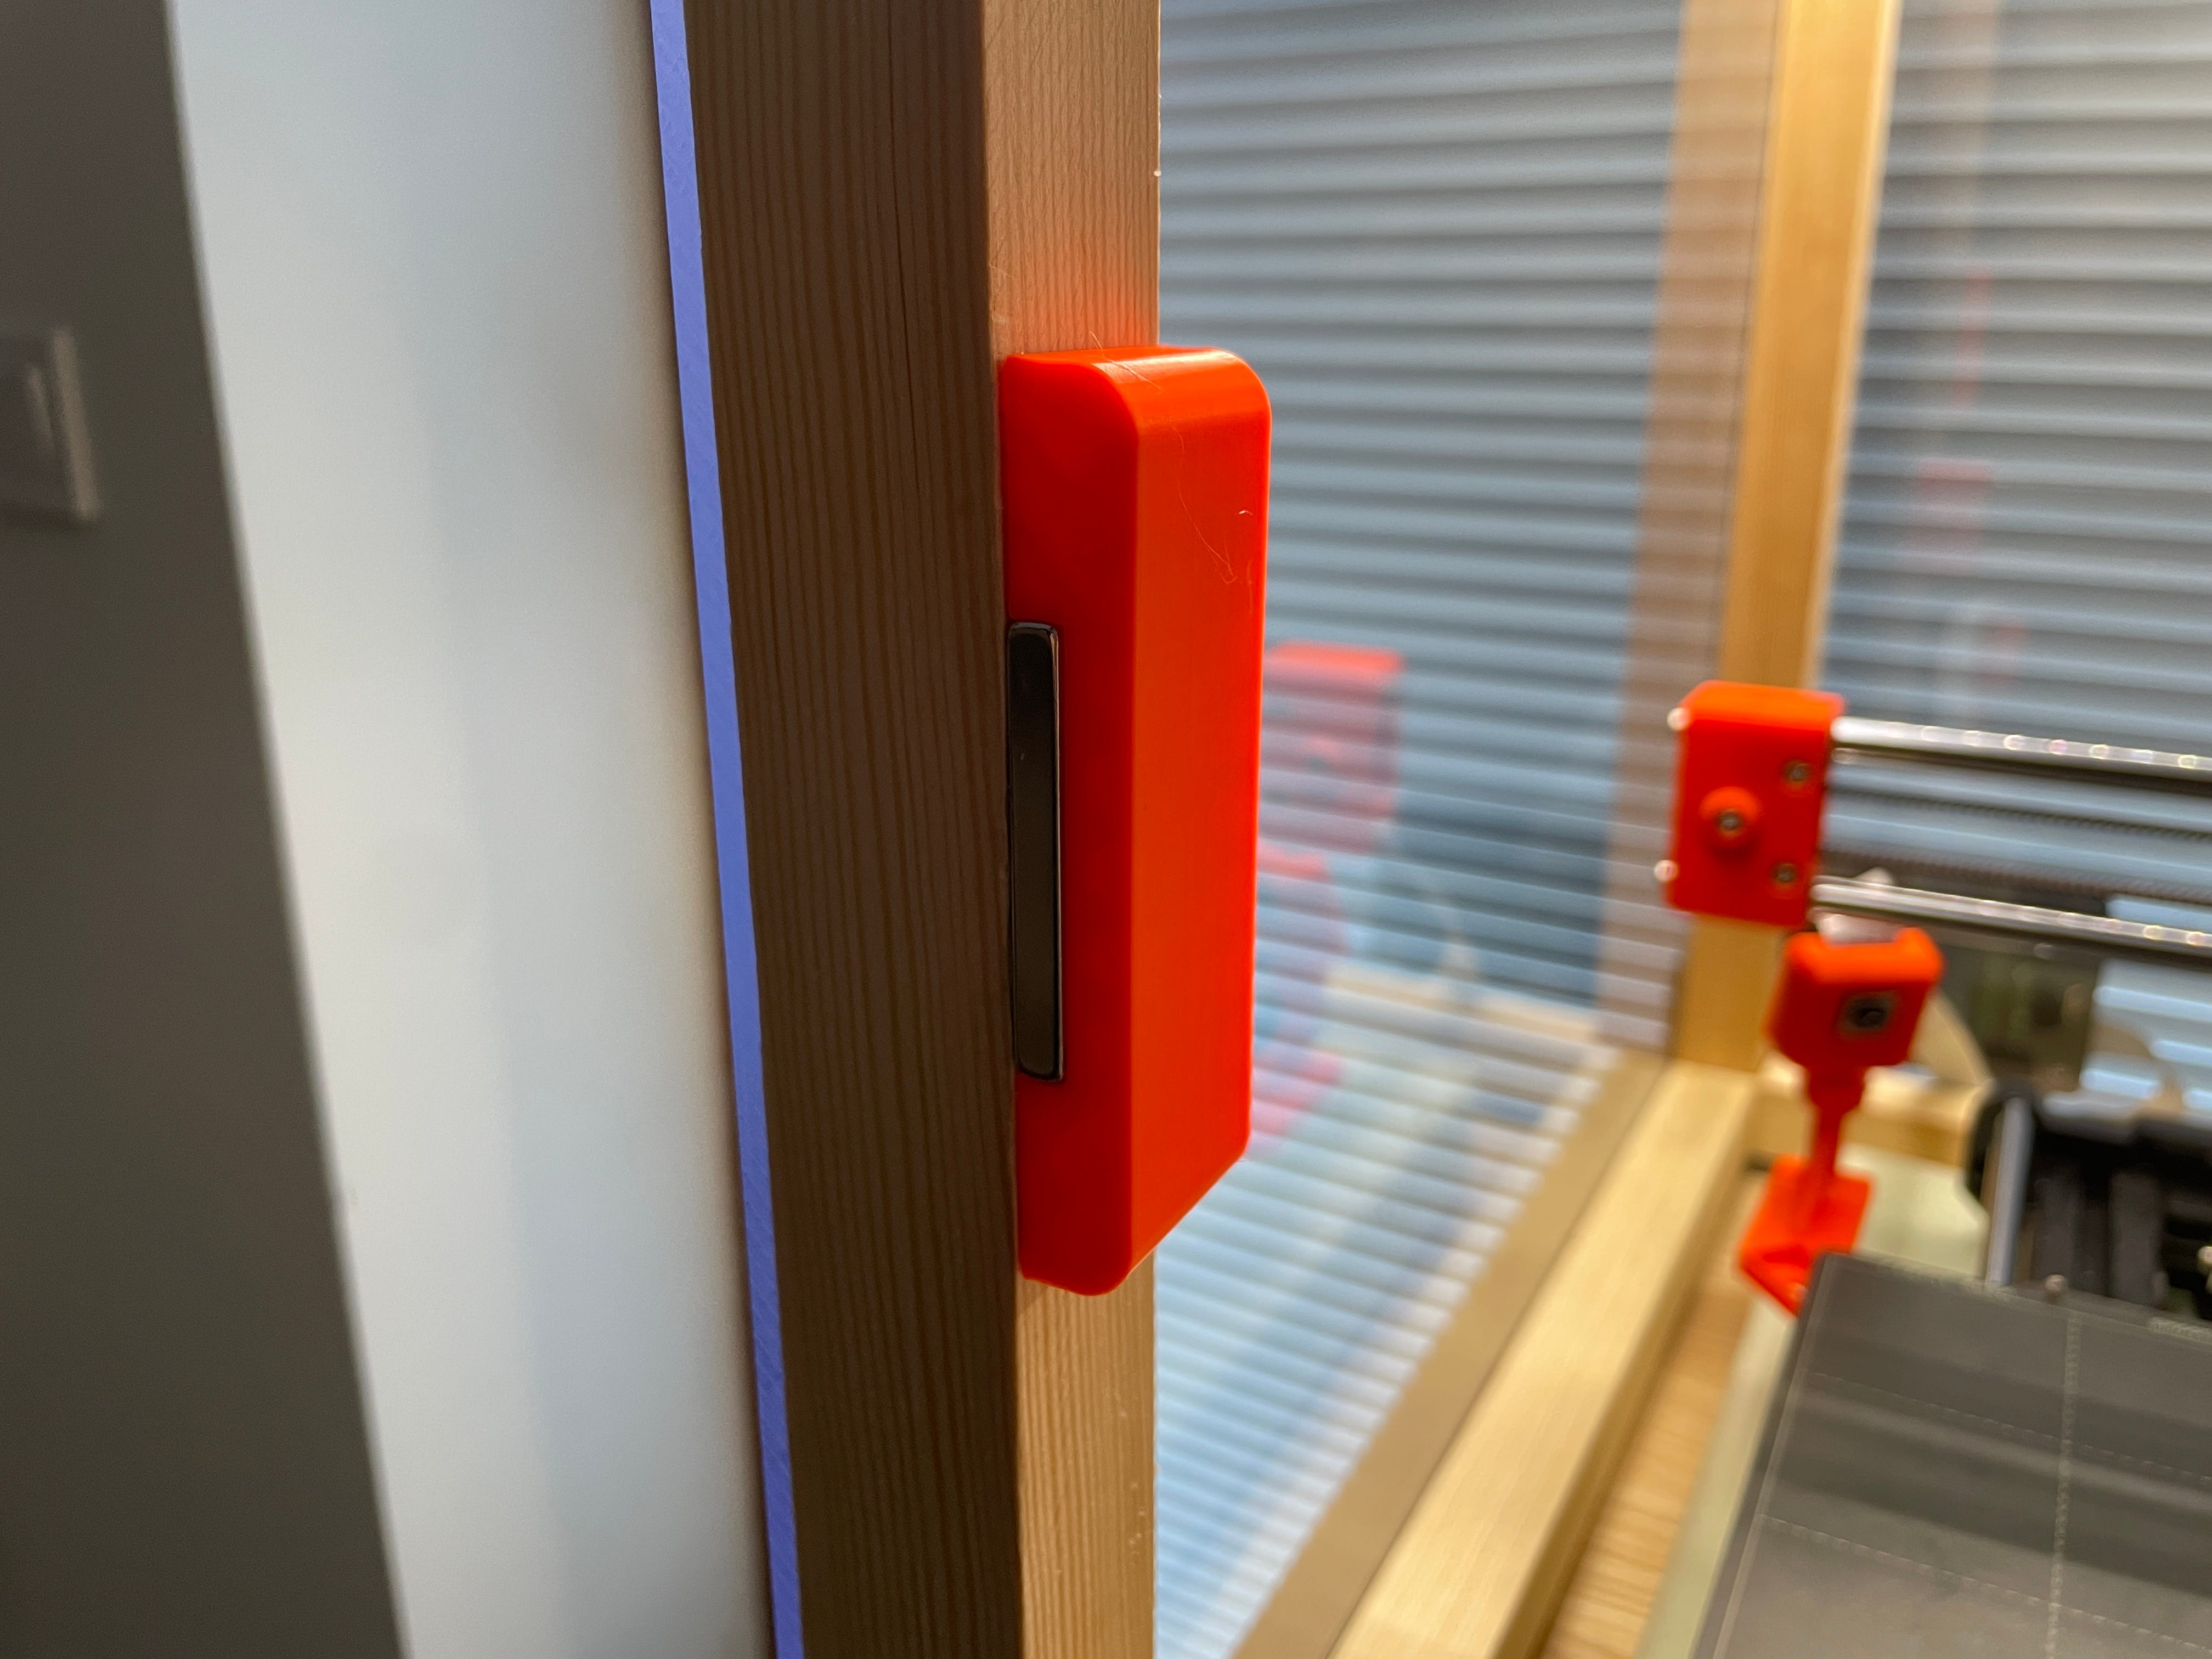
After many iterations, I have ended up with these parts:
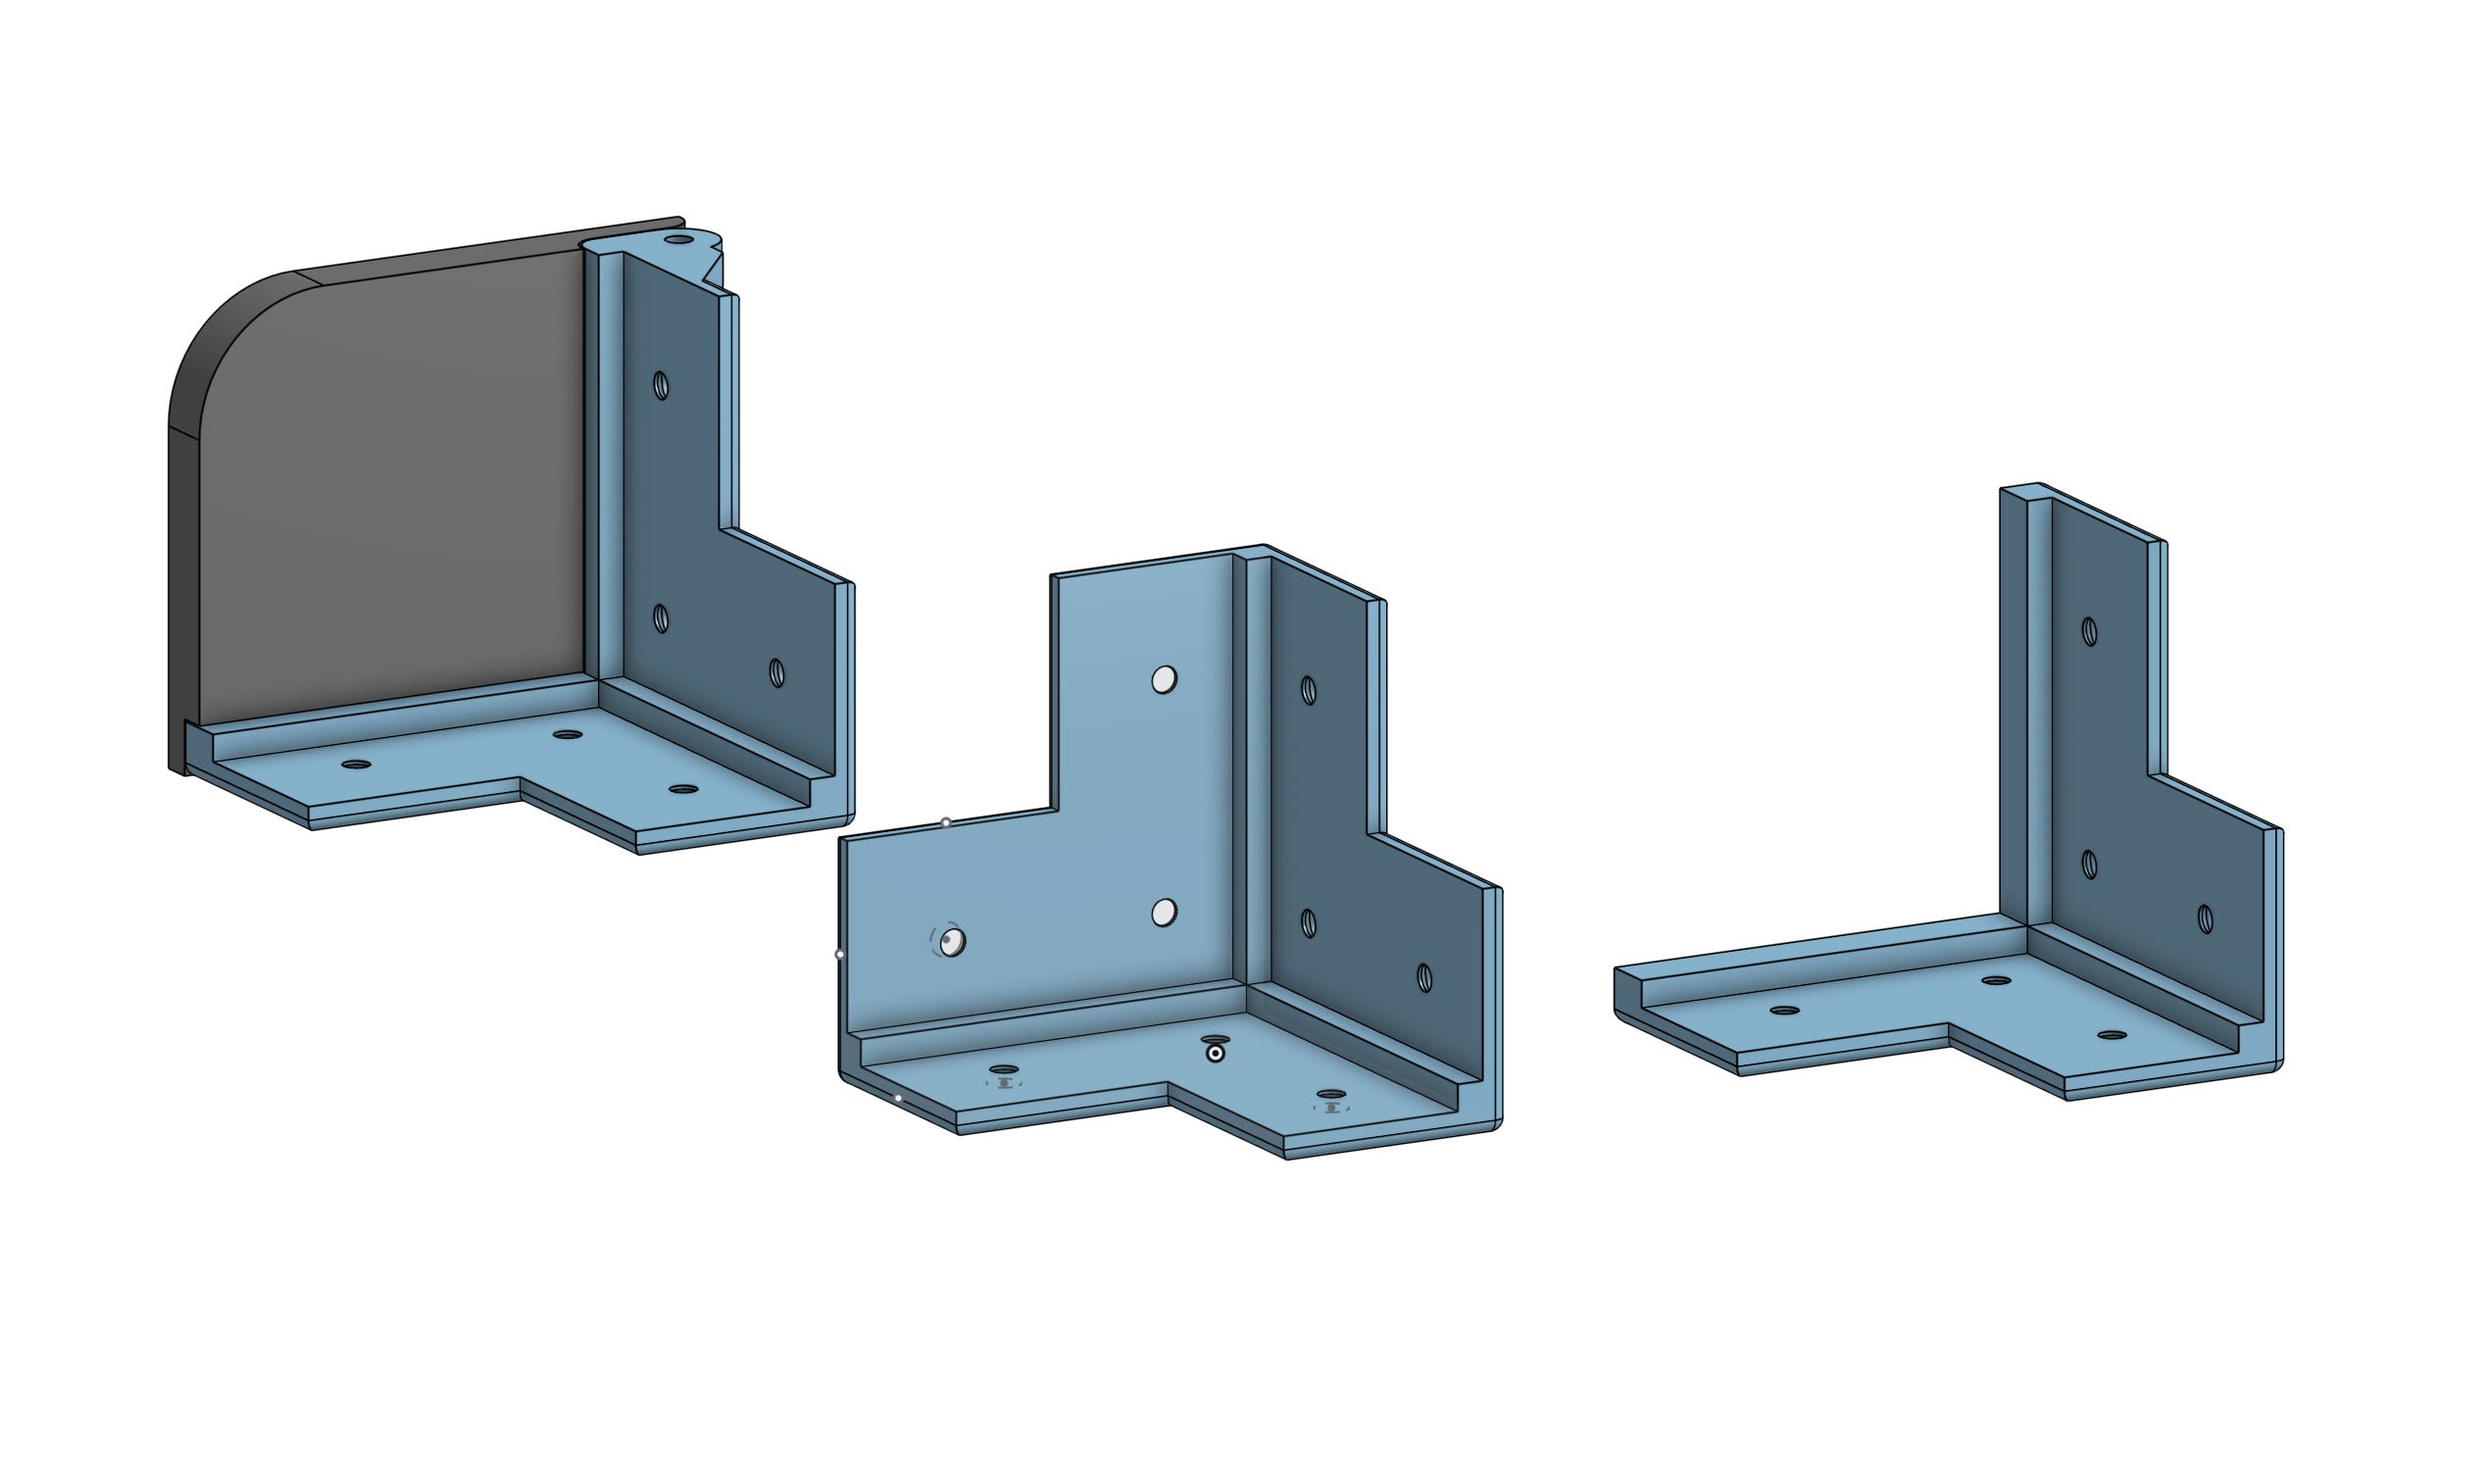
Each piece also has a slot or space for the plexiglass. This way, we can secure both the plexiglass and the beams together.
Oh, did I mention the hinge? It took me a while, but I came up with a sturdy design. And I also learned how to animate stuff.
I used a round aluminum piece for the hinge pin.
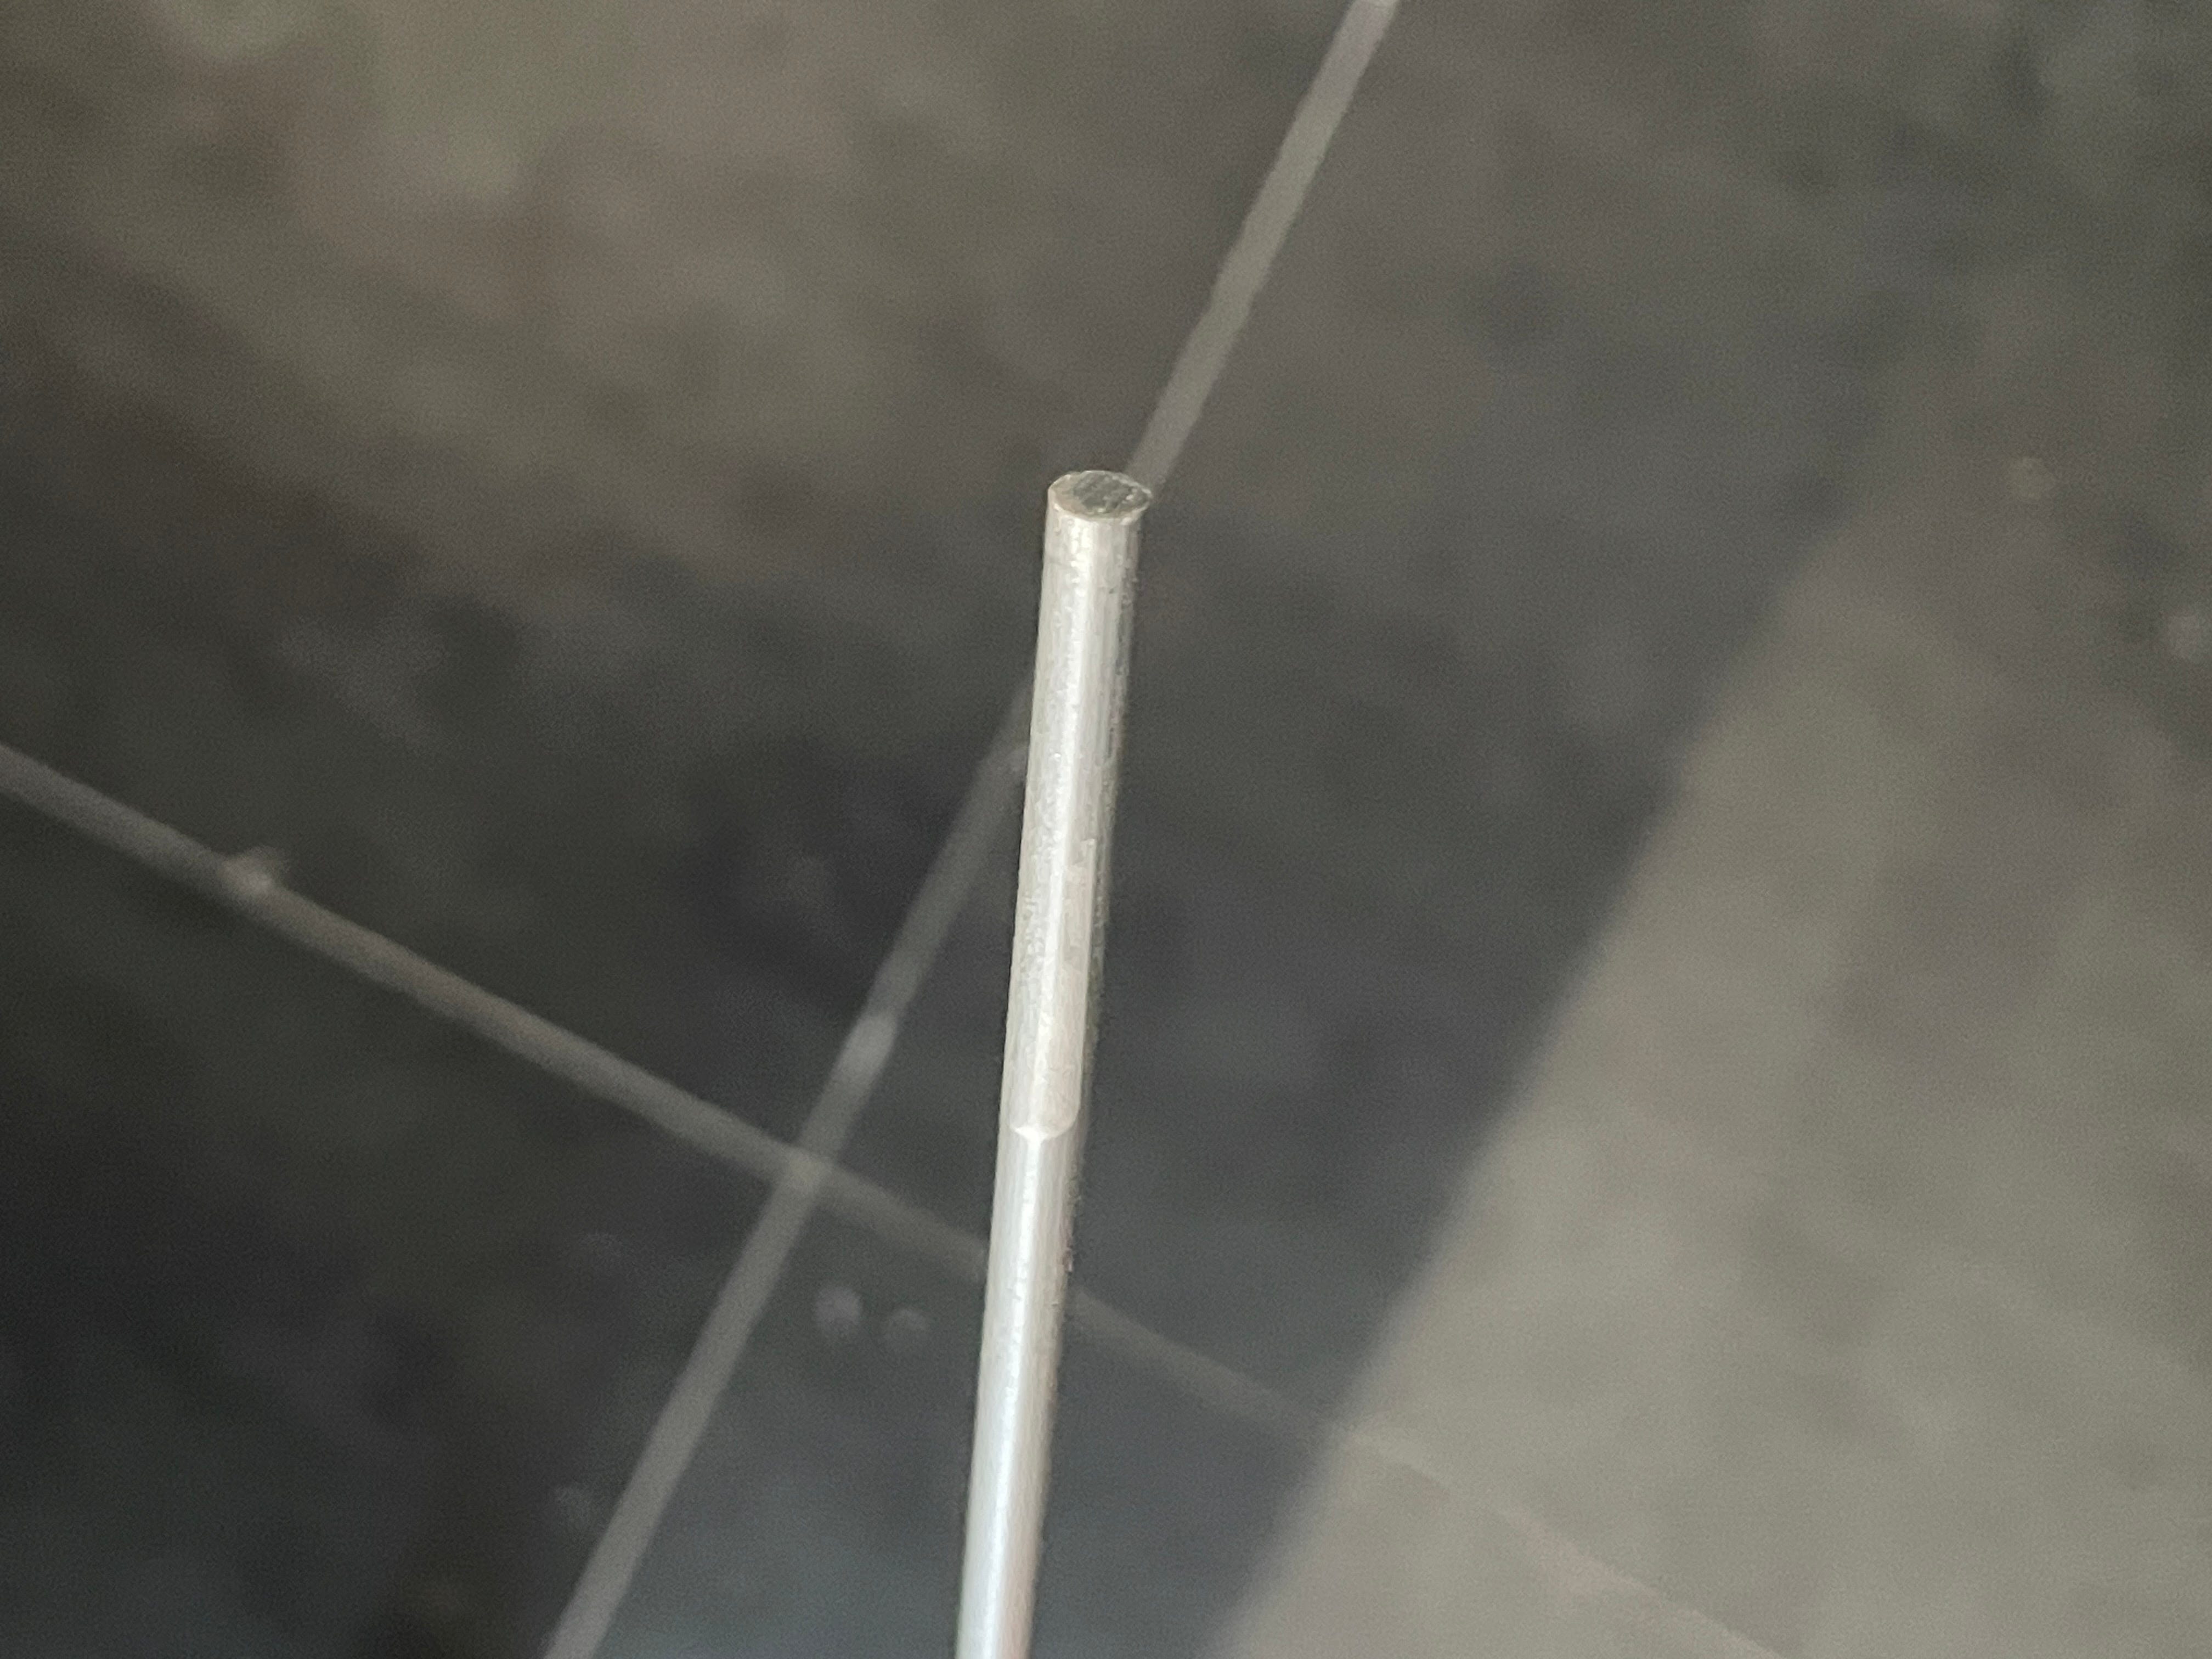
To ensure a proper fit, I mounted it in a drill and then used sandpaper to grind it down to the right size.
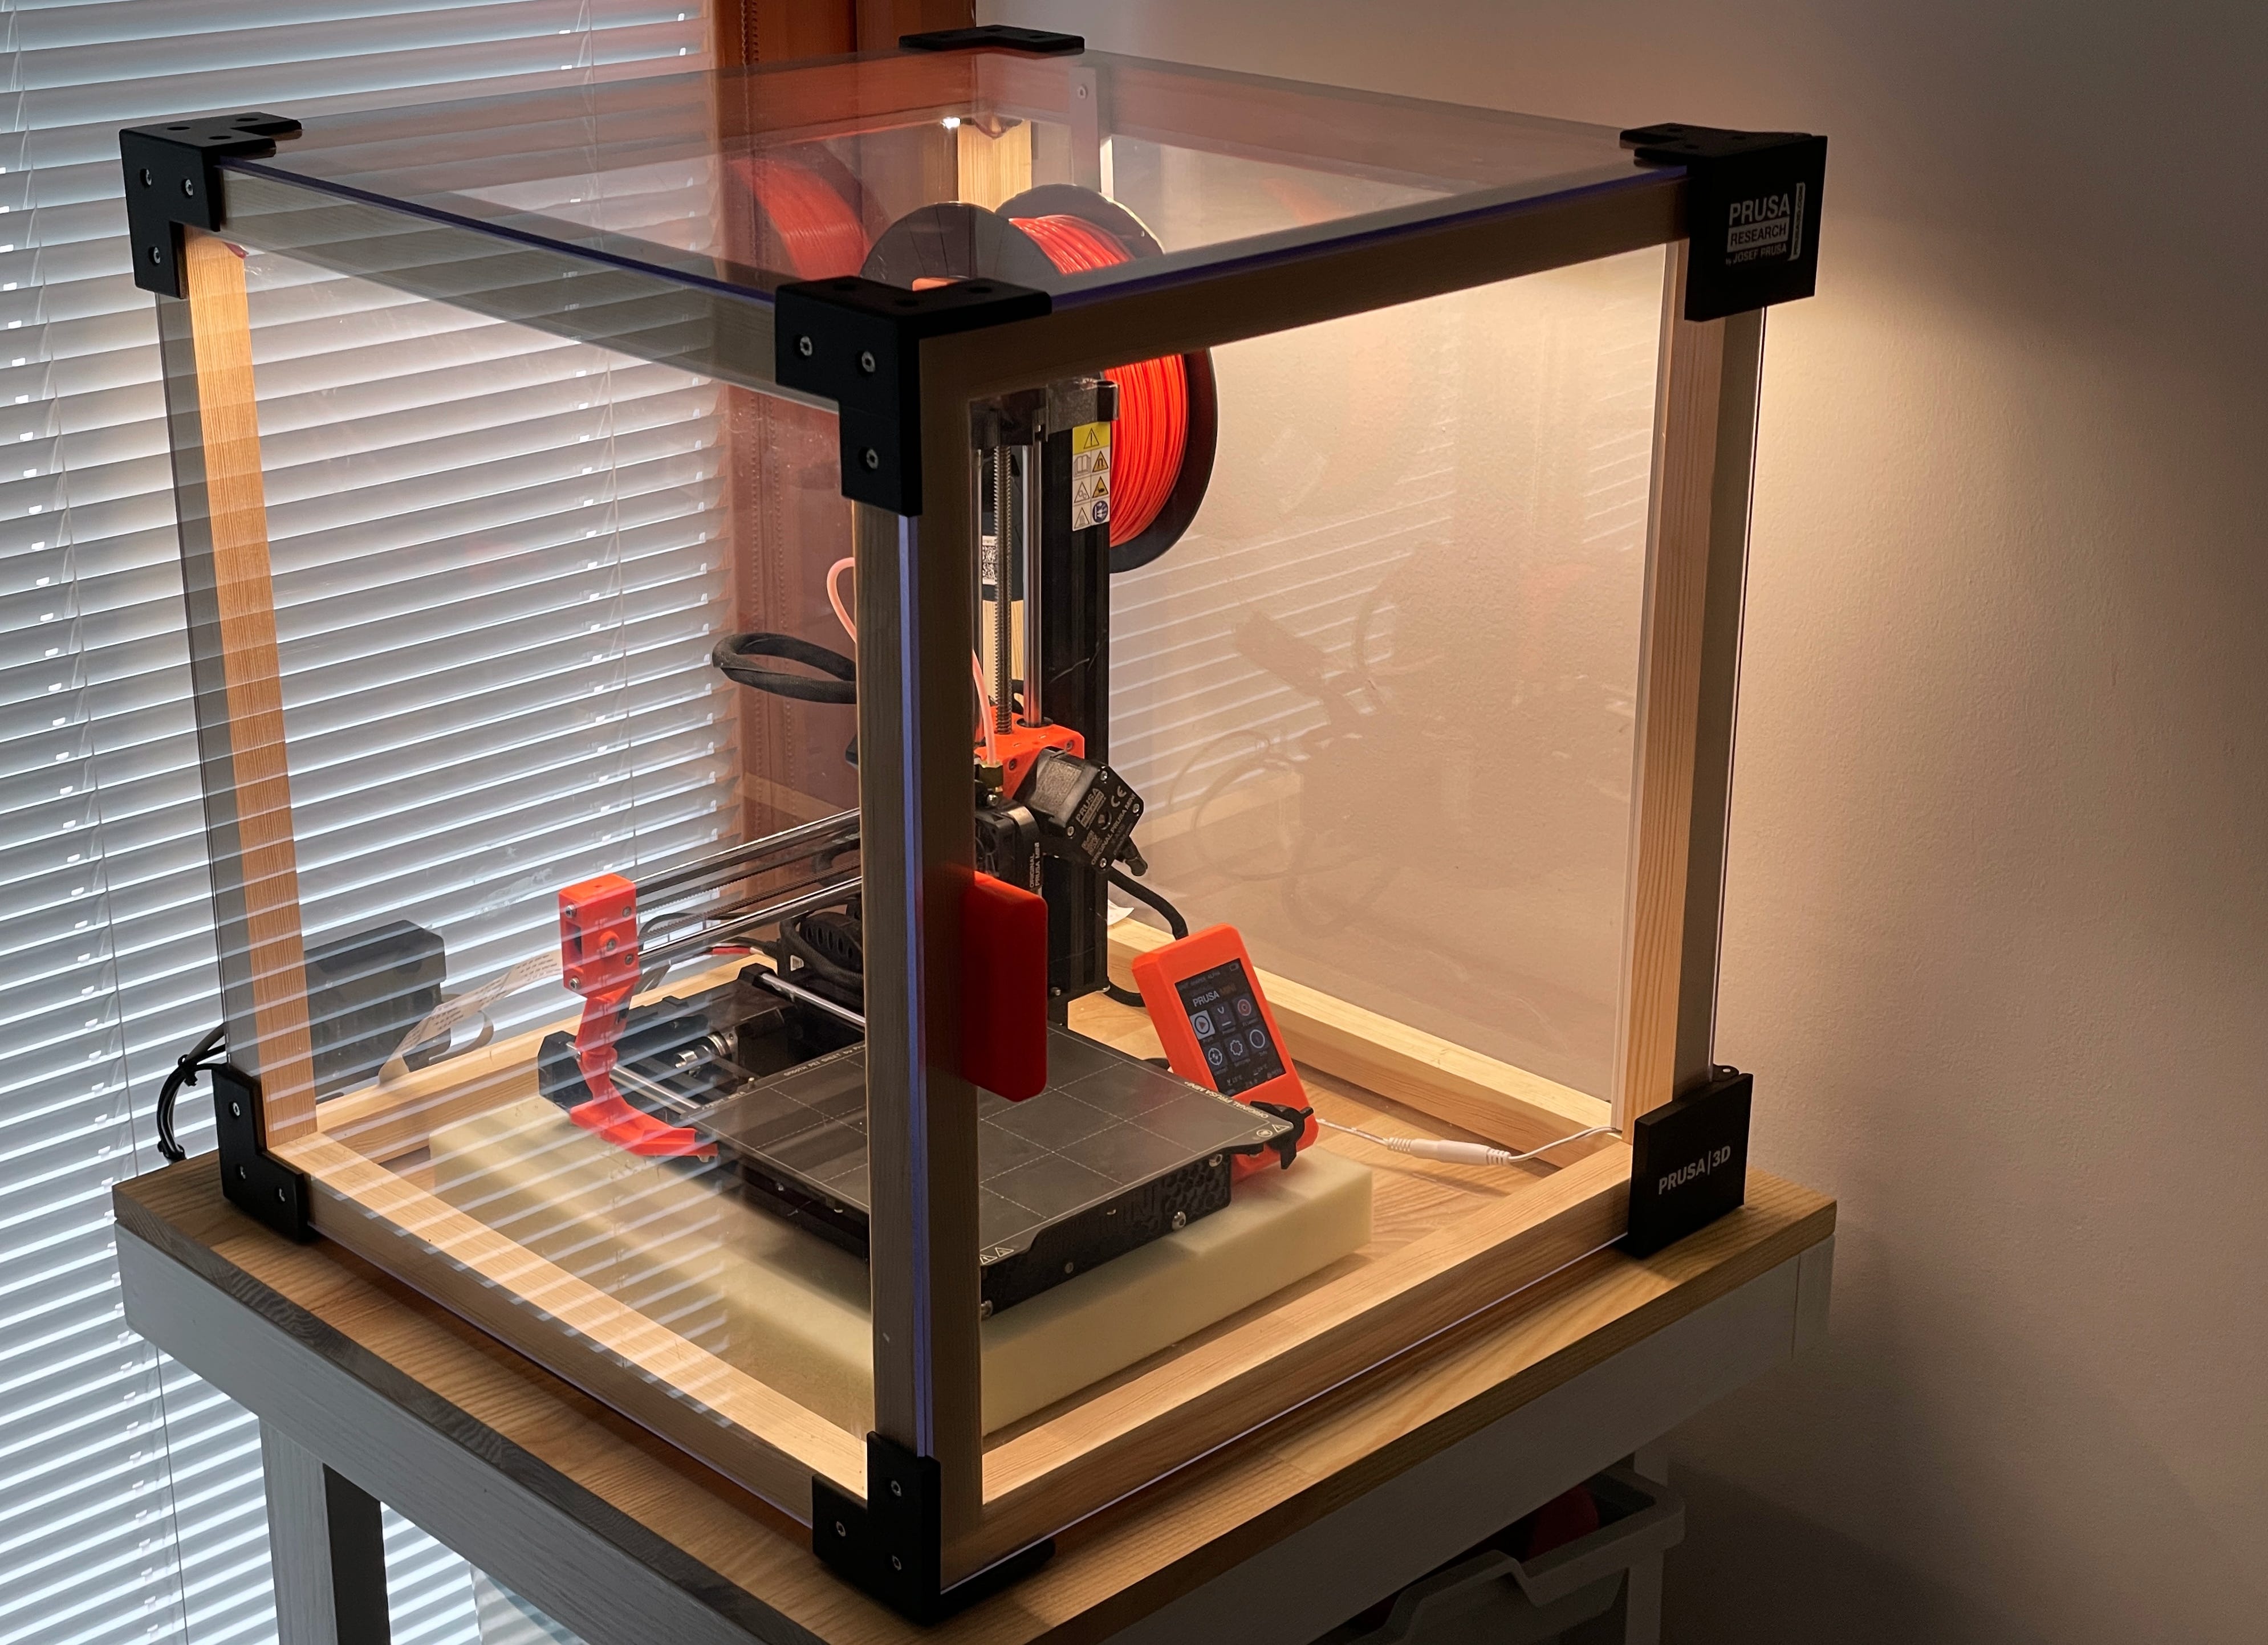
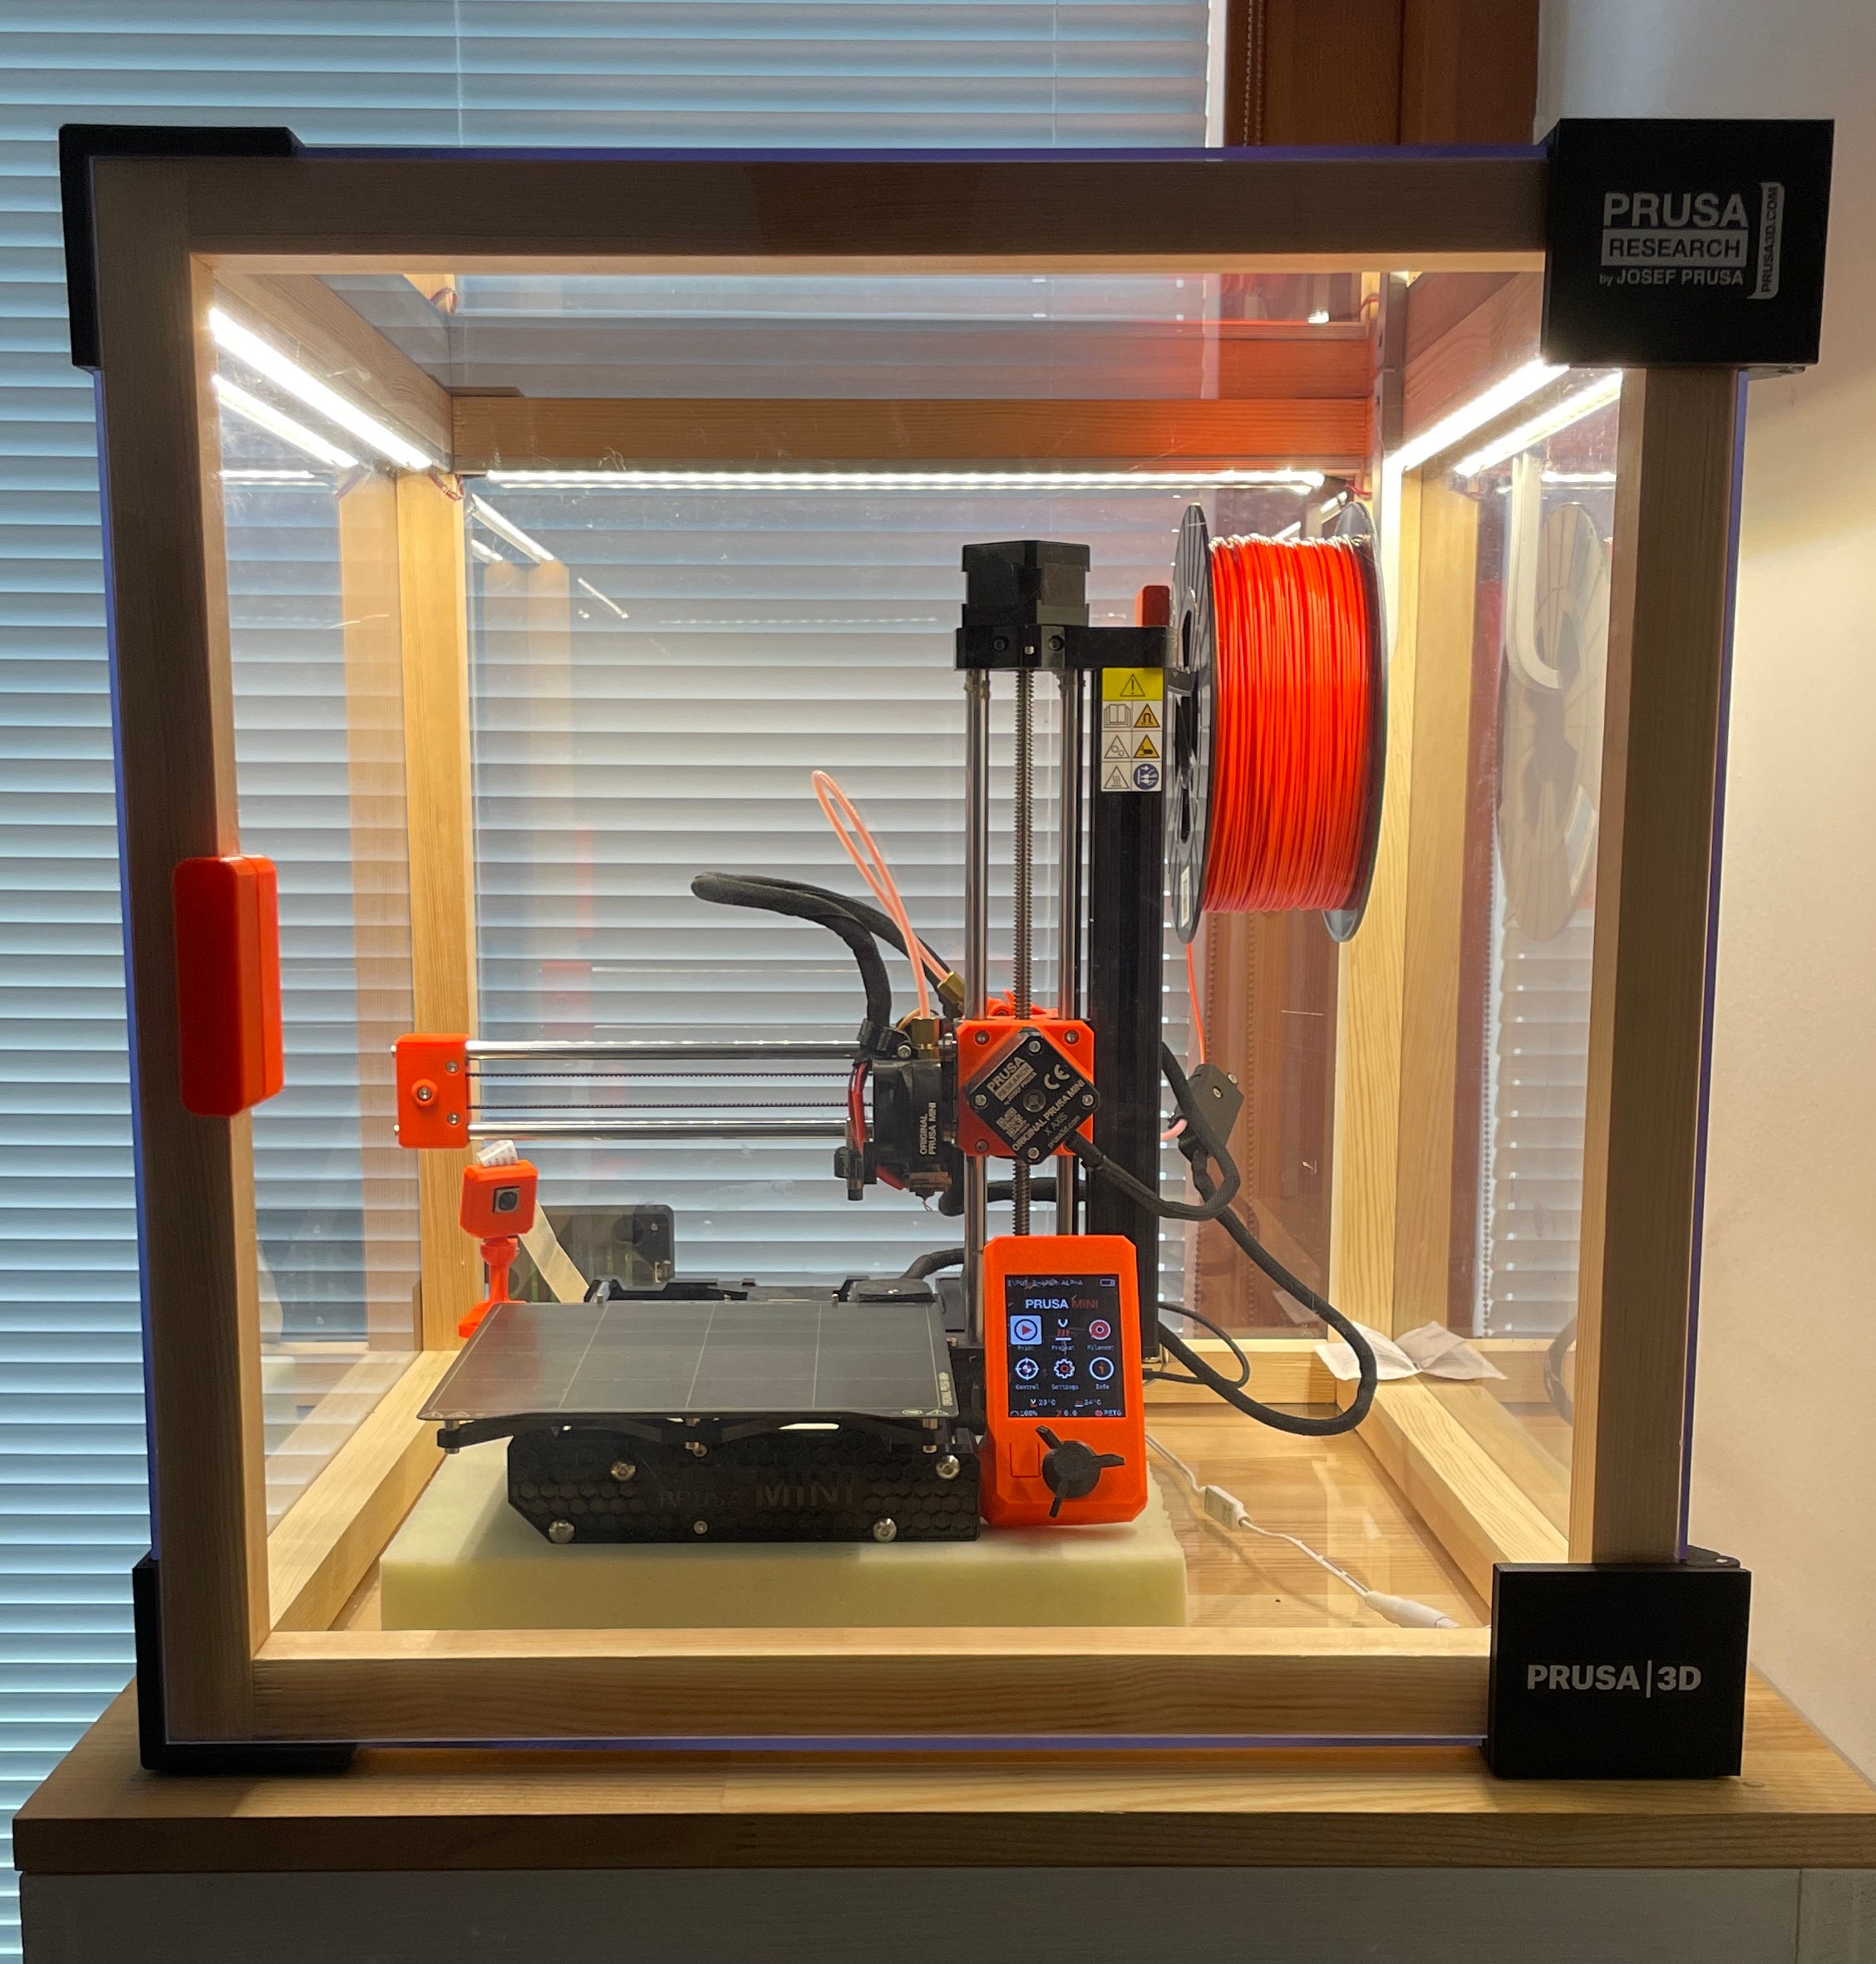
I won't dive into every detail of the building process since it was pretty straightforward. Here's the outcome (missing the front for now).
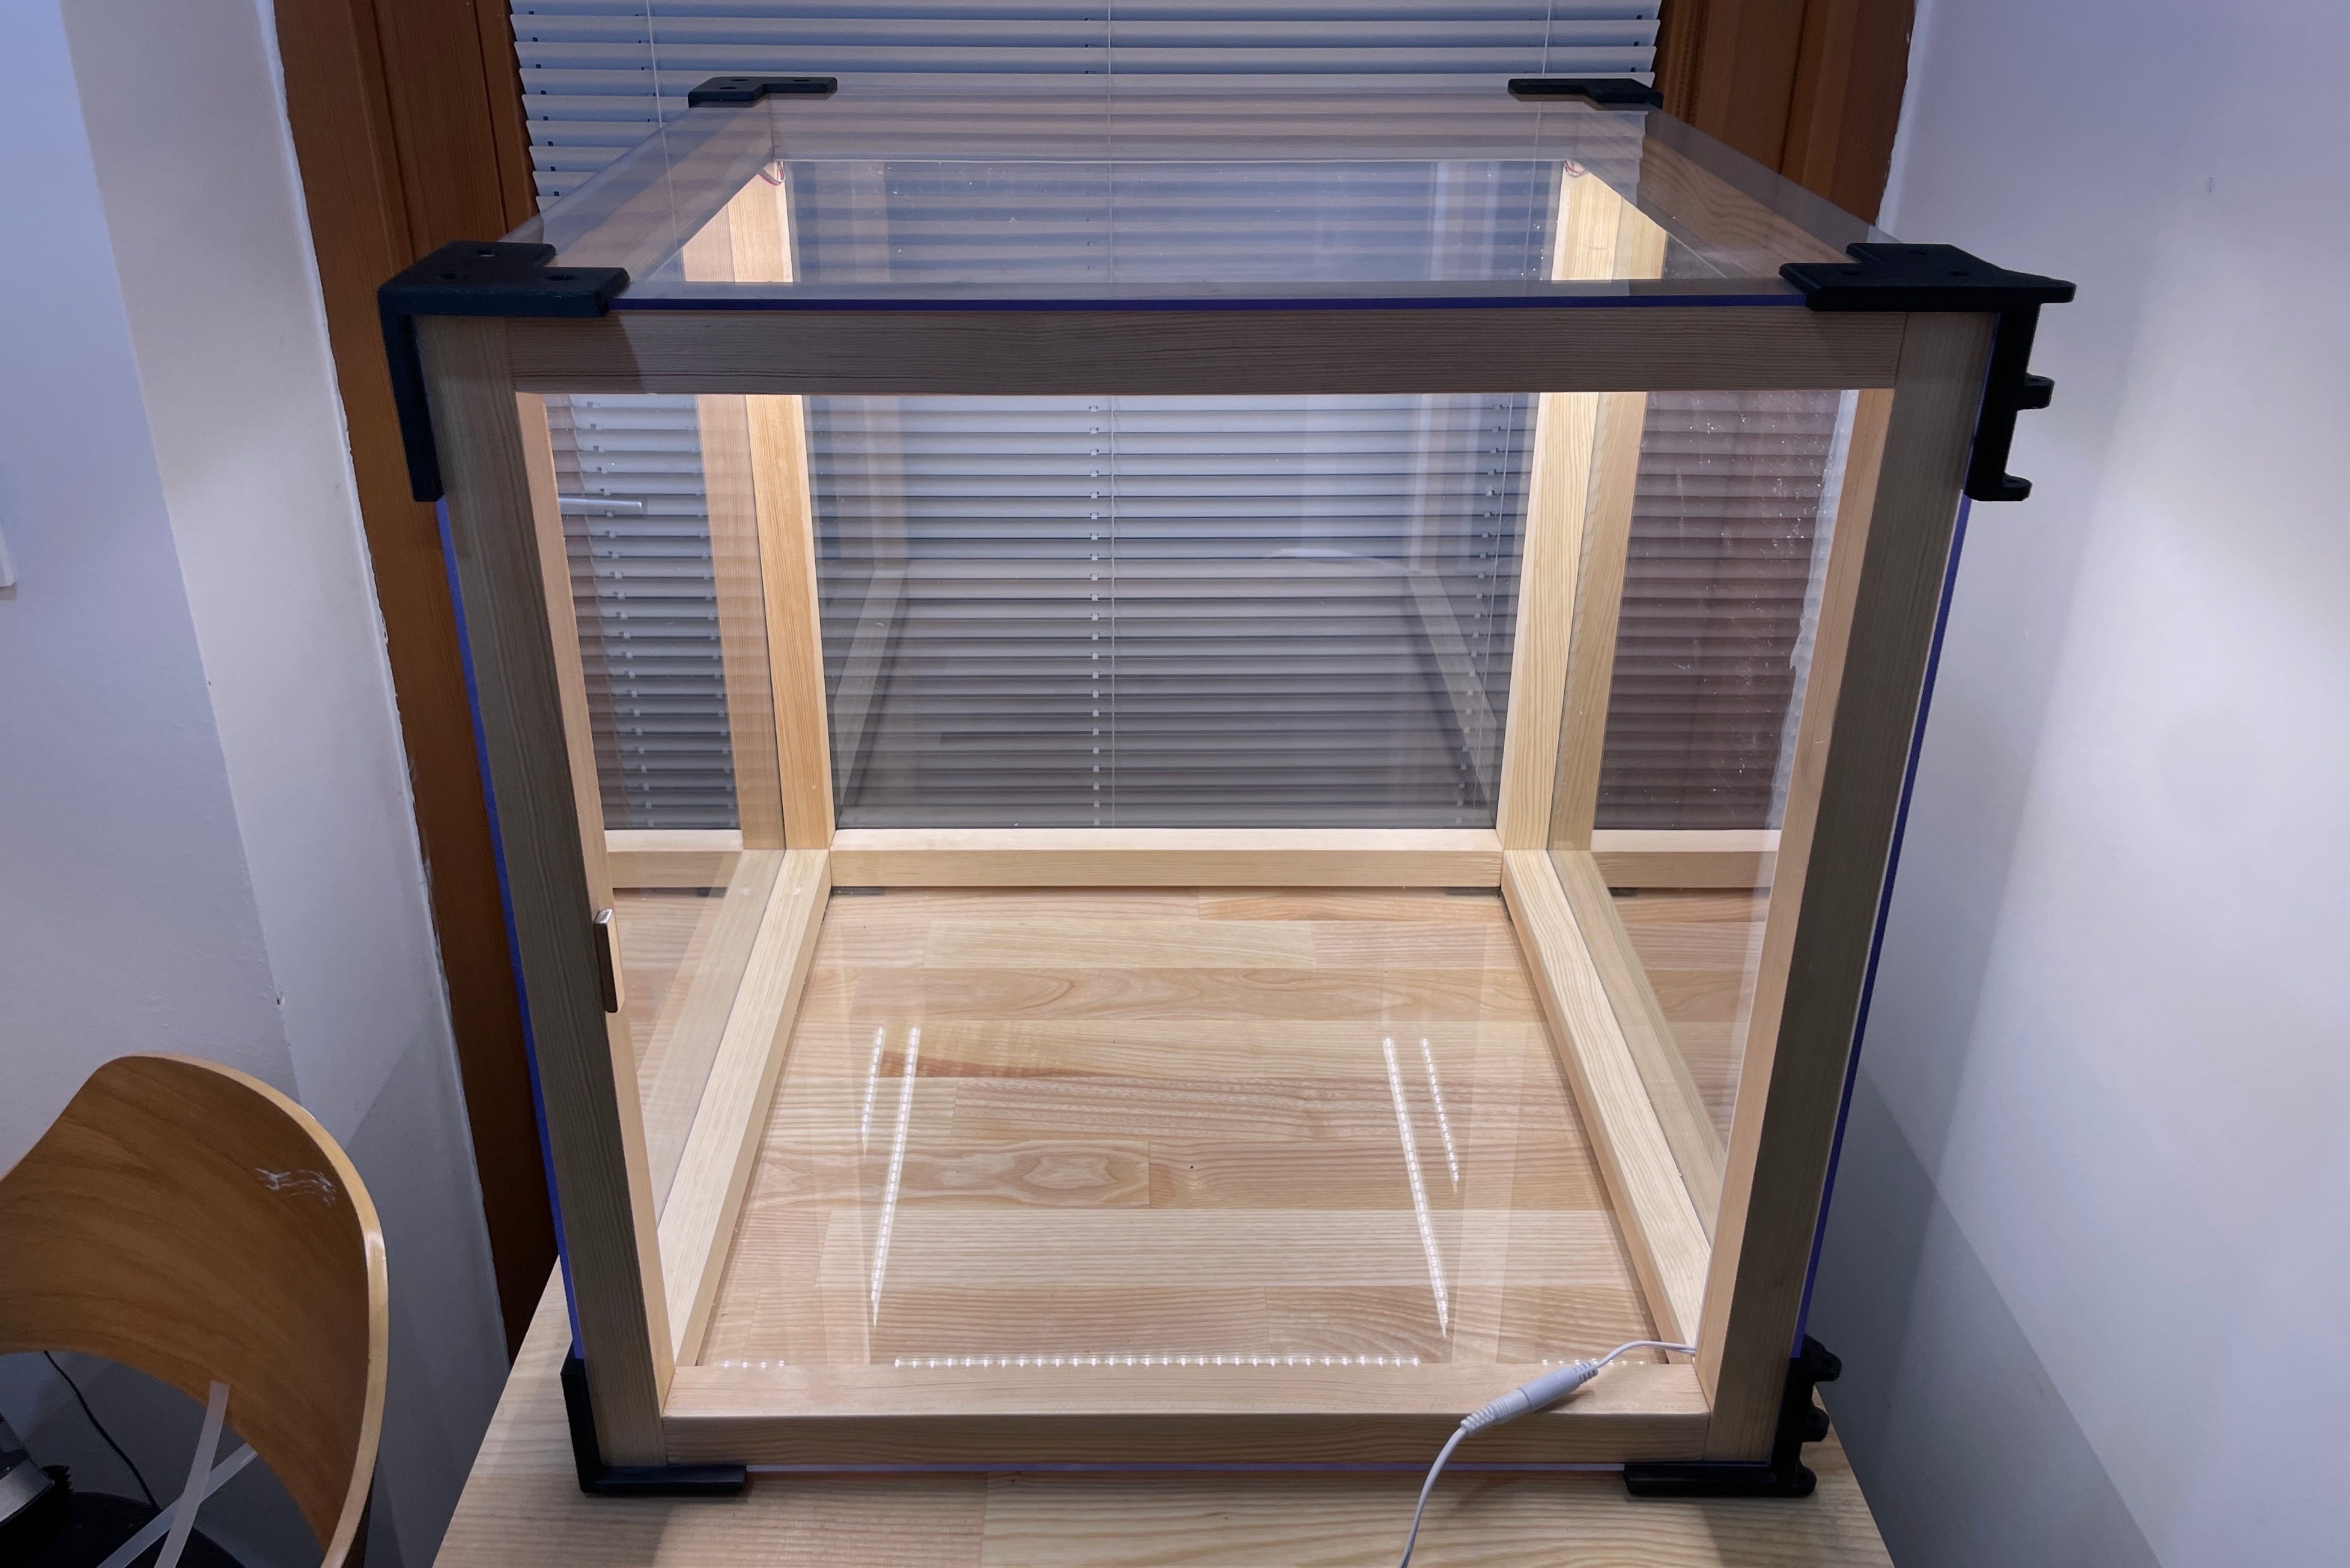
Finalising
Well, I still needed to put in the front door and check if the hinges were functional. Luckily, they proved to be sturdy, and the door shuts smoothly. I did have to sand the hinges slightly since I didn't leave any wiggle room there. But that was intentional; I wanted everything to fit just right.
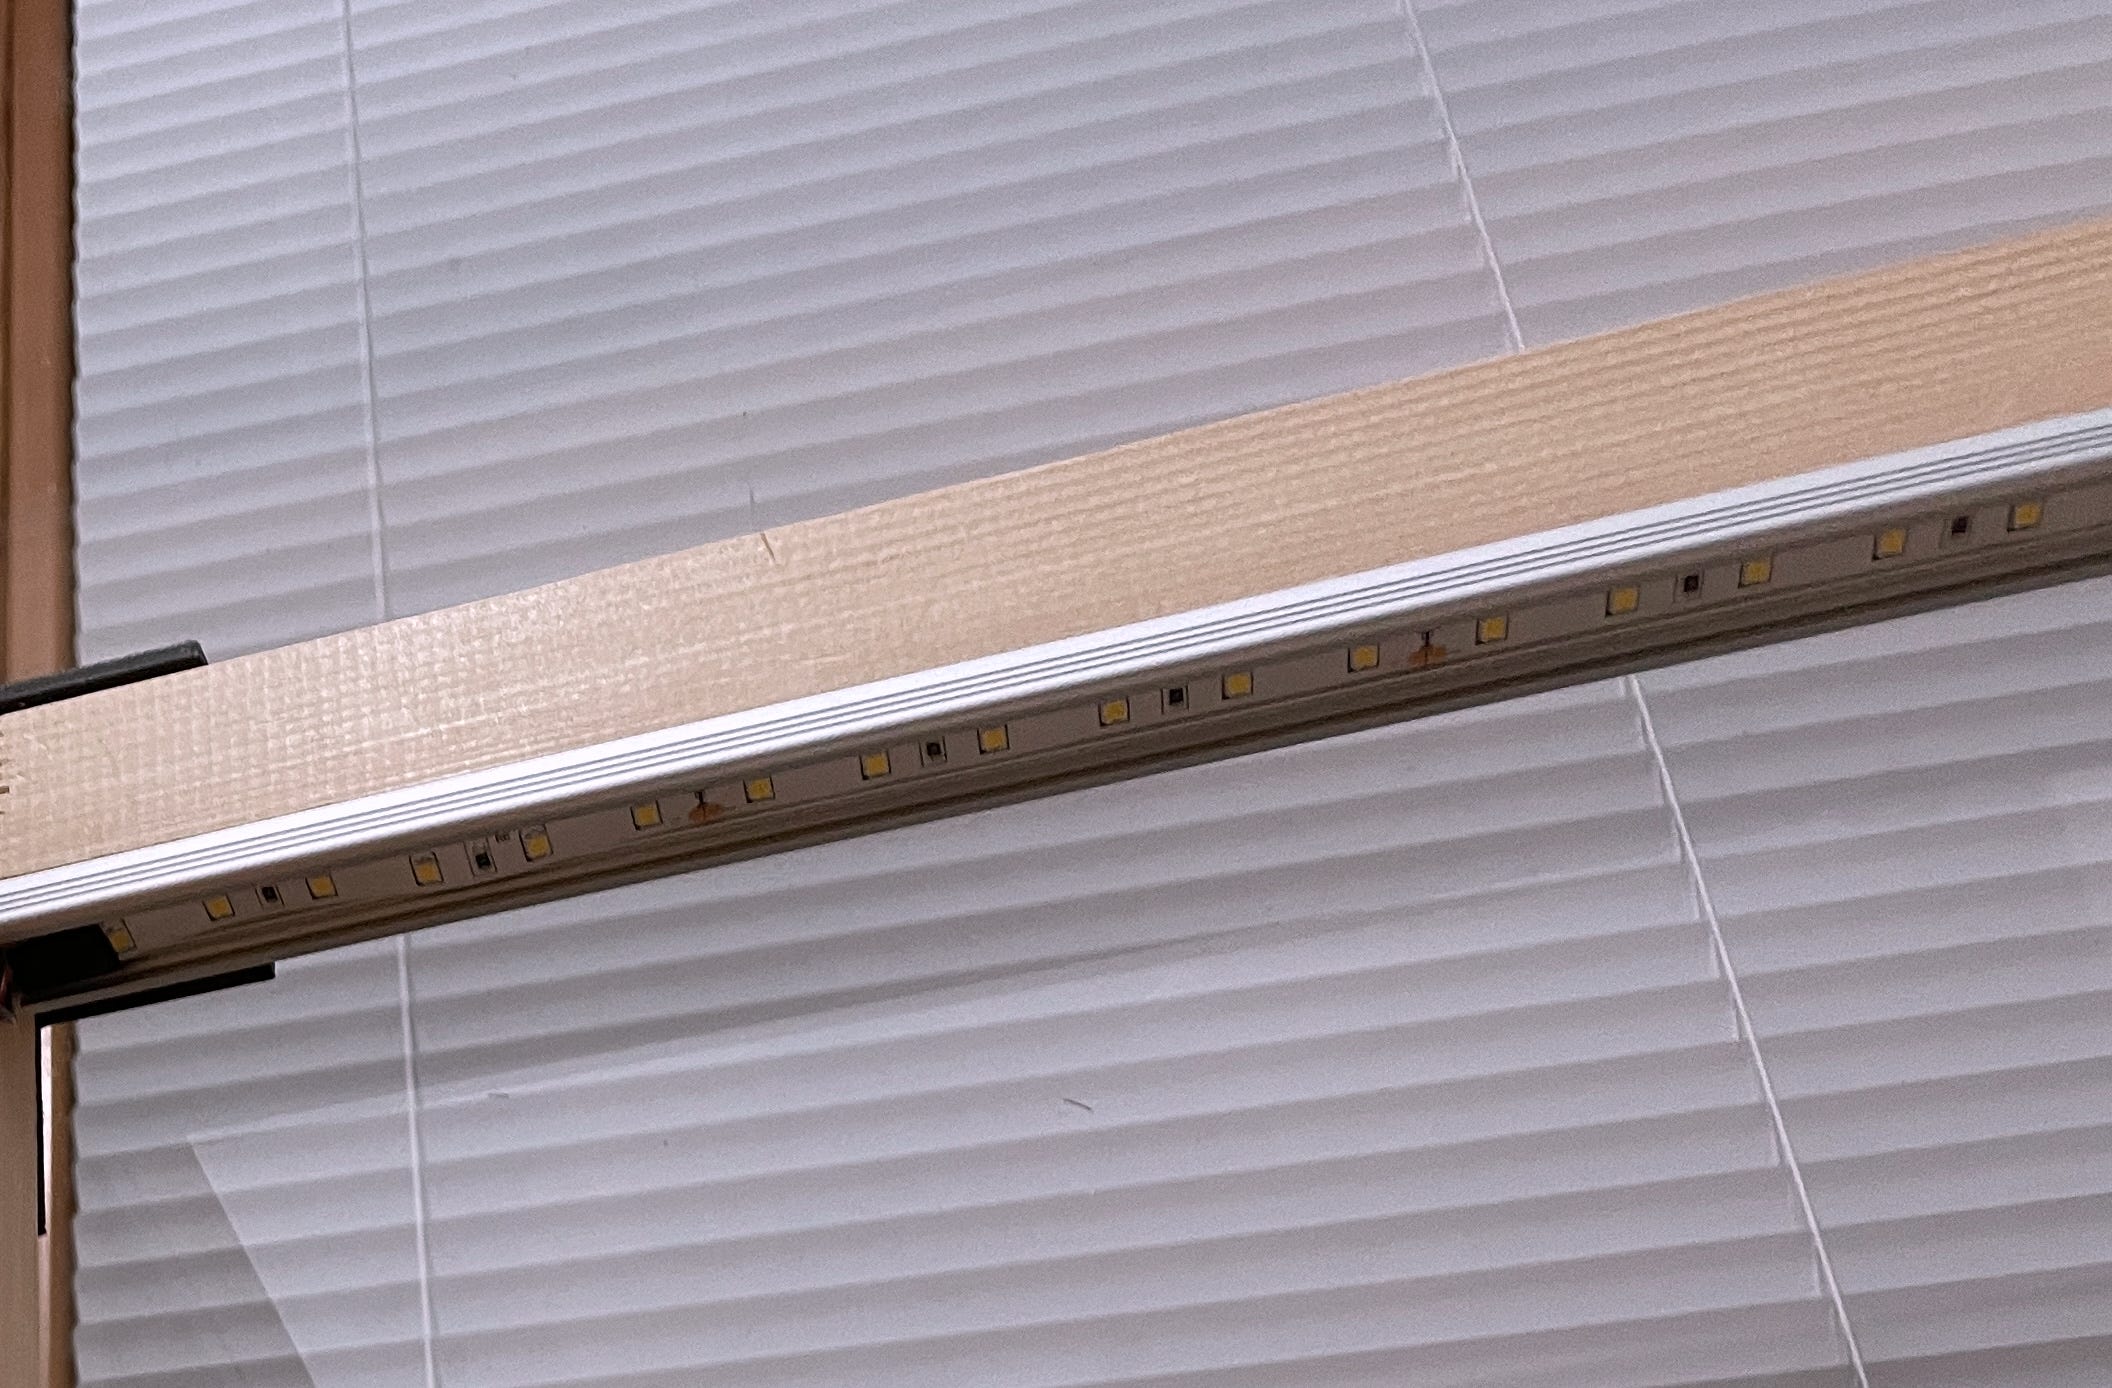
As I touched on earlier, I've completed the lighting as well. I purchased a 24V LED strip and mounted it on an aluminum profile. This setup ensures better cooling and prevents the strip from resting directly on the wood. One way to power the LED strip is straight from the Prusa Mini printer. However, the light tends to flicker when the bed heats up or when the stepper motors are in action—the source just isn't built to handle that. In the end, I hooked it up using external power source.
I also installed a spool holder. It's made from a curved aluminum profile with a plastic tip.

In addition to other tweaks, I made and attached a handle to the door with super glue, finding it to be the most effective for bonding PETG and plexiglass. To keep the doors securely closed, I employed neodymium magnets.
Wrapping Things Up
Overall, it wasn't the cheapest endeavour ($150 total), especially considering the LED strip alone cost around $40. I also spent a fair amount on filament due to the trial and error process. It took up days of my time. But it's more about the journey than the destination :)
Part List
Wooden beams: 2.8 x 2.8 cm
2 hinges; one mirrored on the Y-axis.
Round aluminum/steel piece for the hinge pins (diameter 4 mm, 70 mm long)
4 identical corner brackets.
2 front-facing brackets without one side (one mirrored on the Y-axis).
Handle
2 neodymium magnets 10 x 40 x 5 mm.
Links
What next?
I'd like to incorporate an internal filtration system too. When you open the door, the fumes hit you right in the face and it's quite unpleasant. Activated carbon is needed to filter out the fumes.
I'd like to install a self-extinguishing system. There are tubes available that burst when temperatures exceed around 120 degrees celsius.